injector v7
Author: Janne Veijola
- Главная
- Разное
- Дизайн
- Бизнес и предпринимательство
- Аналитика
- Образование
- Развлечения
- Красота и здоровье
- Финансы
- Государство
- Путешествия
- Спорт
- Недвижимость
- Армия
- Графика
- Культурология
- Еда и кулинария
- Лингвистика
- Английский язык
- Астрономия
- Алгебра
- Биология
- География
- Детские презентации
- Информатика
- История
- Литература
- Маркетинг
- Математика
- Медицина
- Менеджмент
- Музыка
- МХК
- Немецкий язык
- ОБЖ
- Обществознание
- Окружающий мир
- Педагогика
- Русский язык
- Технология
- Физика
- Философия
- Химия
- Шаблоны, картинки для презентаций
- Экология
- Экономика
- Юриспруденция
Introductions to positioning access points презентация
Содержание
- 1. Introductions to positioning access points
- 2. General Guidelines – Positioning Access Points
- 3. General Guidelines – Positioning Access Points
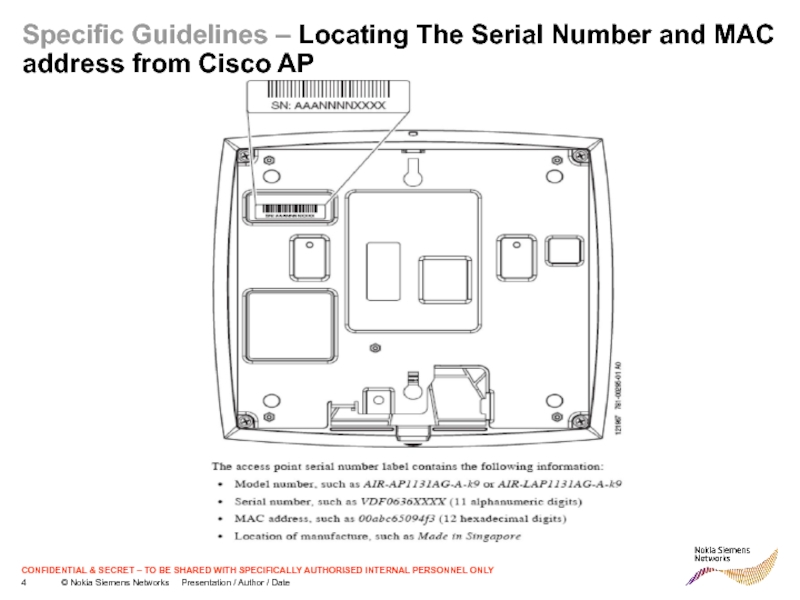
- 4. Specific Guidelines – Locating The Serial Number and MAC address from Cisco AP
- 5. Specific Guidelines – Serial Number and MAC
- 6. Specific Guidelines – Serial Number and MAC
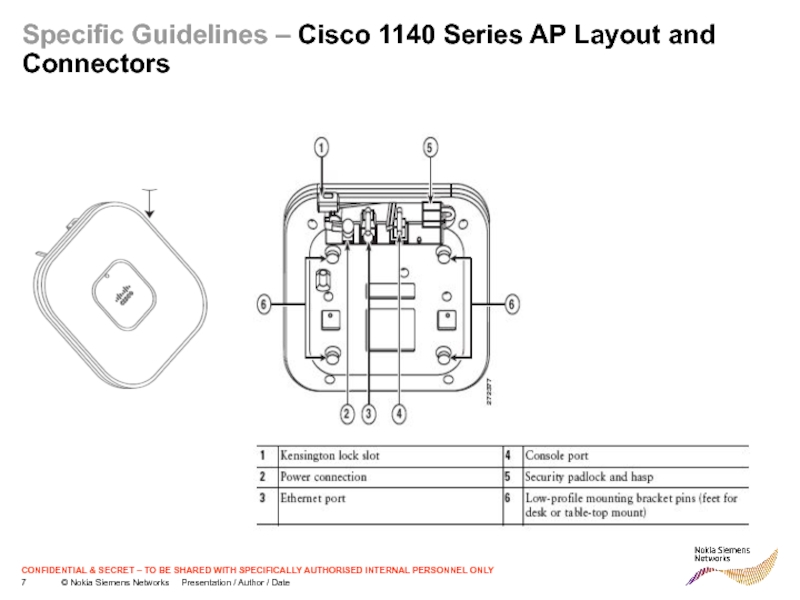
- 7. Specific Guidelines – Cisco 1140 Series AP Layout and Connectors
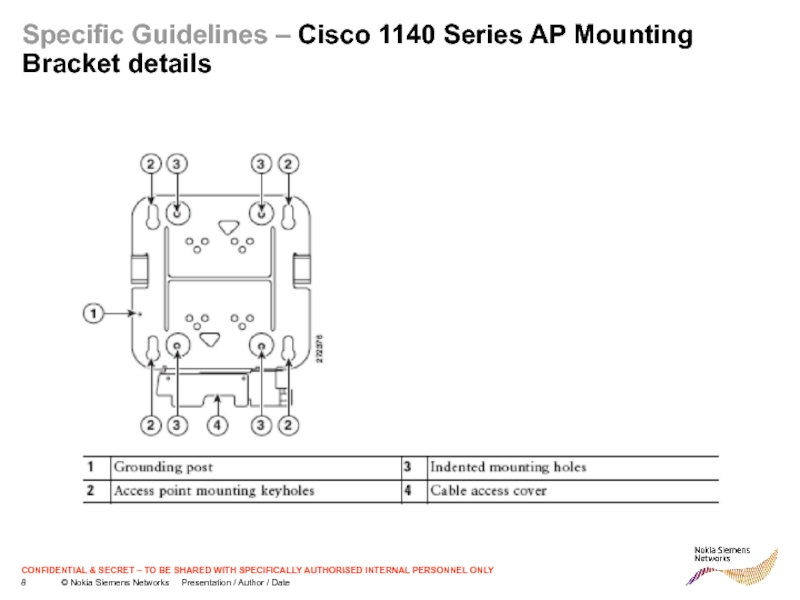
- 8. Specific Guidelines – Cisco 1140 Series AP Mounting Bracket details
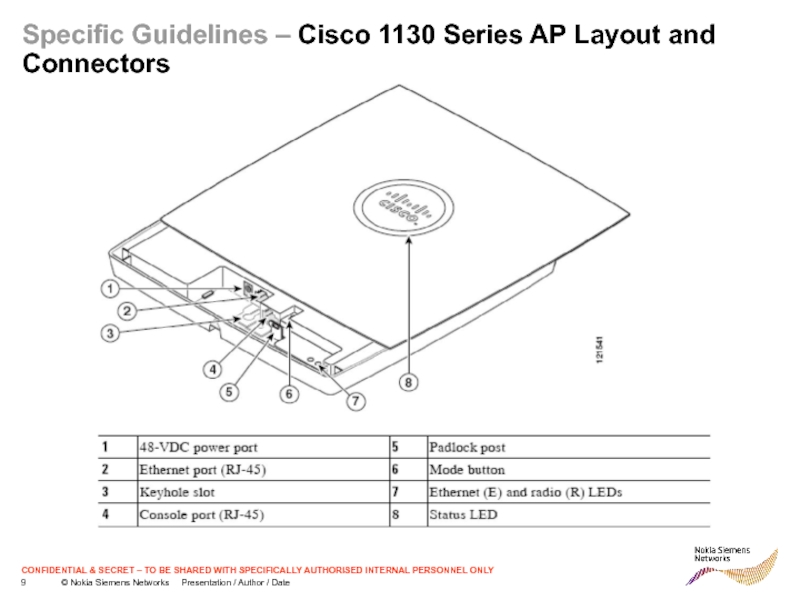
- 9. Specific Guidelines – Cisco 1130 Series AP Layout and Connectors
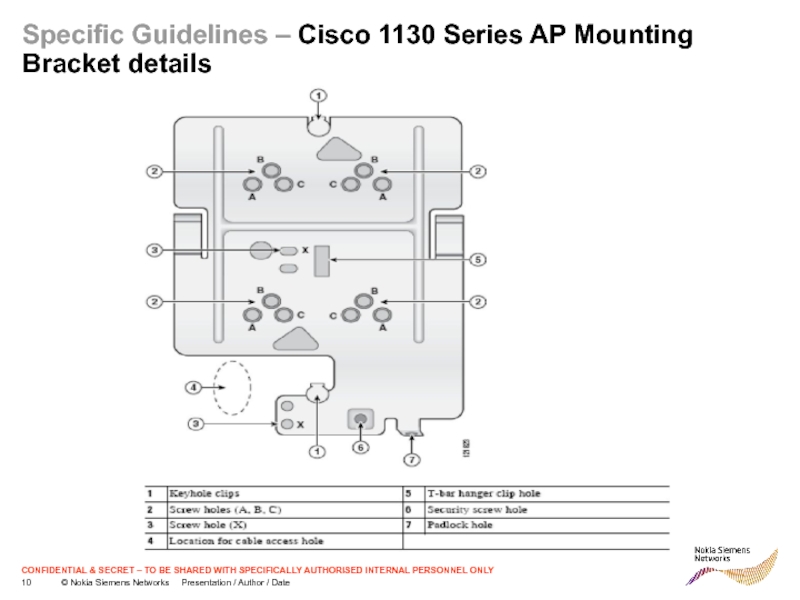
- 10. Specific Guidelines – Cisco 1130 Series AP Mounting Bracket details
- 11. Specific Guidelines – Mounting the AP on
- 12. Specific Guidelines – Poor AP Placement
- 13. Specific Guidelines – Poor AP Placement Poor placement, APs placed near to each other
- 14. General Guidelines – Positioning Access Points
- 15. PoE injector installation Usually PoE power
- 16. Post deployment end user level connectivity testing
Слайд 2General Guidelines – Positioning Access Points
APs shall be mounted as
close as possible to locations that have been shown in the radio plan document
The length of the work area AP patch cable shall not exceed 5 m
Ensure that access points are not mounted closer than 1.5 meters (5 feet) from the body of all persons
Do not mount the access point within 90 cm (3 feet) of metal obstructions
Install the access point away from microwave ovens. Microwave ovens operate on the same frequency as the access point and can cause signal interference
Mount access points only inside the building
If possible avoid mounting access points on walls or other vertical surfaces
Слайд 3General Guidelines – Positioning Access Points
APs shall be mounted below
a ceiling
Visual contact between users and APs shall be maintained
APs shall NOT be mounted above a ceiling
Visual contact between users and APs shall be maintained
APs shall NOT be mounted above a ceiling
Слайд 5Specific Guidelines – Serial Number and MAC address delivery – IMPORTANT
Before AP mounting, record AP serial number and MAC address to the “NSN WLAN Hardware Data for HP 2012.xlsx” Excel document (IMPORTANT)
Return the updated “NSN WLAN Hardware Data for HP 2012.xlsx” to IT PM (IMPORTANT)
If APs will be relocated from other NSN site to the new site or stored in the office, please refer file “wlan device storing or delivery from site X to site Y v06 .xlsx” (IMPORTANT)
and proceed with mounting as defined on next slide number 6
Слайд 6Specific Guidelines – Serial Number and MAC address delivery – IMPORTANT
Please see AP device number from site’s “AP locations.ppt” document sent by radio planner
Stick name label to AP cover (IMPORTANT)
- access point / floor 9 / device number 07 => ap907
- access point / building e / floor 4 / device number 8 => ape408
- AP name label can be placed on front cover and it has to be well distinguishable with characters at least 20 mm (the same name label can be used for PoE injector naming as well, please refer slide 15)
Complete access point installation and write up RJ45 sockets that are connected to APs
Provide RJ45 numbers to WLAN project contact
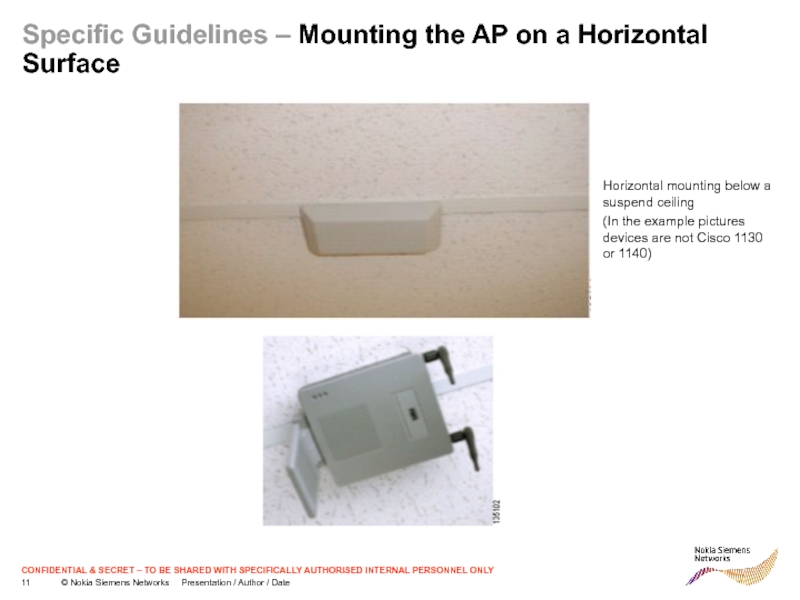
Слайд 11Specific Guidelines – Mounting the AP on a Horizontal Surface
Horizontal mounting
below a suspend ceiling
(In the example pictures devices are not Cisco 1130 or 1140)
(In the example pictures devices are not Cisco 1130 or 1140)
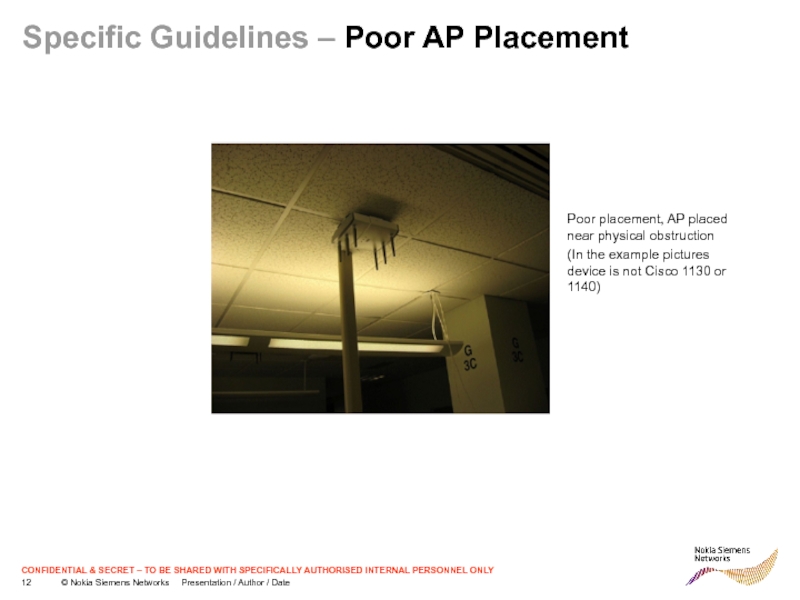
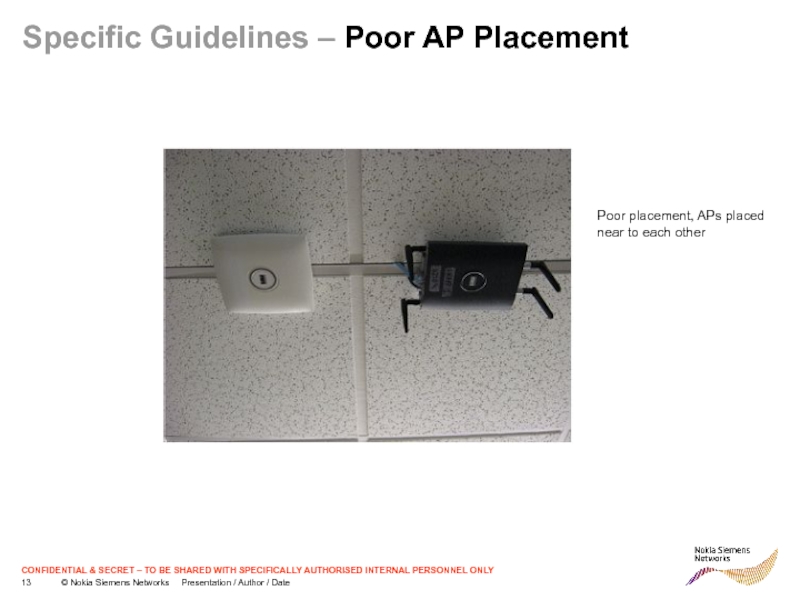
Слайд 12Specific Guidelines – Poor AP Placement
Poor placement, AP placed near
physical obstruction
(In the example pictures device is not Cisco 1130 or 1140)
(In the example pictures device is not Cisco 1130 or 1140)
Слайд 14General Guidelines – Positioning Access Points
Please see more details about
Cisco 1140 AP mounting from the document “Cisco Aironet 1140 Series AP Getting Started Guide.pdf” which is shipped with Access Point
Please see more details about Cisco 1130 AP mounting from the document “Cisco Aironet 1130AG Series Access Point Hardware Installation Guide” which is shipped with Access Point
Please see more details about Cisco 1130 AP mounting from the document “Cisco Aironet 1130AG Series Access Point Hardware Installation Guide” which is shipped with Access Point
Слайд 15PoE injector installation
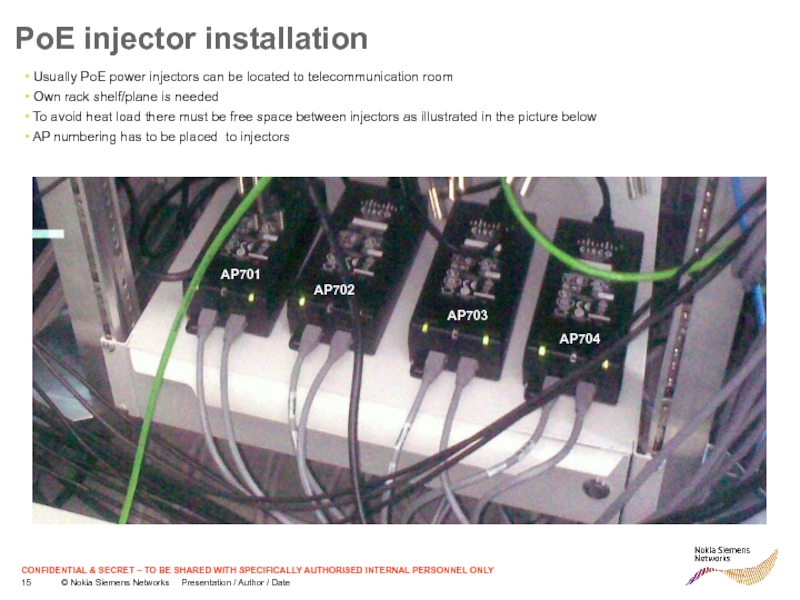
Usually PoE power injectors can be located to
telecommunication room
Own rack shelf/plane is needed
To avoid heat load there must be free space between injectors as illustrated in the picture below
AP numbering has to be placed to injectors
Own rack shelf/plane is needed
To avoid heat load there must be free space between injectors as illustrated in the picture below
AP numbering has to be placed to injectors
AP701
AP702
AP703
AP704
Слайд 16Post deployment end user level connectivity testing
Once all WLAN devices
are installed according to radio plan, configured and operating normally then end user level connectivity testing can be started (IMPORTANT)
Base test steps are listed to “WLAN_Deployment_Checklist_v1 8.xlsx “
Base test steps are listed to “WLAN_Deployment_Checklist_v1 8.xlsx “
