- Главная
- Разное
- Дизайн
- Бизнес и предпринимательство
- Аналитика
- Образование
- Развлечения
- Красота и здоровье
- Финансы
- Государство
- Путешествия
- Спорт
- Недвижимость
- Армия
- Графика
- Культурология
- Еда и кулинария
- Лингвистика
- Английский язык
- Астрономия
- Алгебра
- Биология
- География
- Детские презентации
- Информатика
- История
- Литература
- Маркетинг
- Математика
- Медицина
- Менеджмент
- Музыка
- МХК
- Немецкий язык
- ОБЖ
- Обществознание
- Окружающий мир
- Педагогика
- Русский язык
- Технология
- Физика
- Философия
- Химия
- Шаблоны, картинки для презентаций
- Экология
- Экономика
- Юриспруденция
Chapter Eight презентация
Содержание
- 1. Chapter Eight
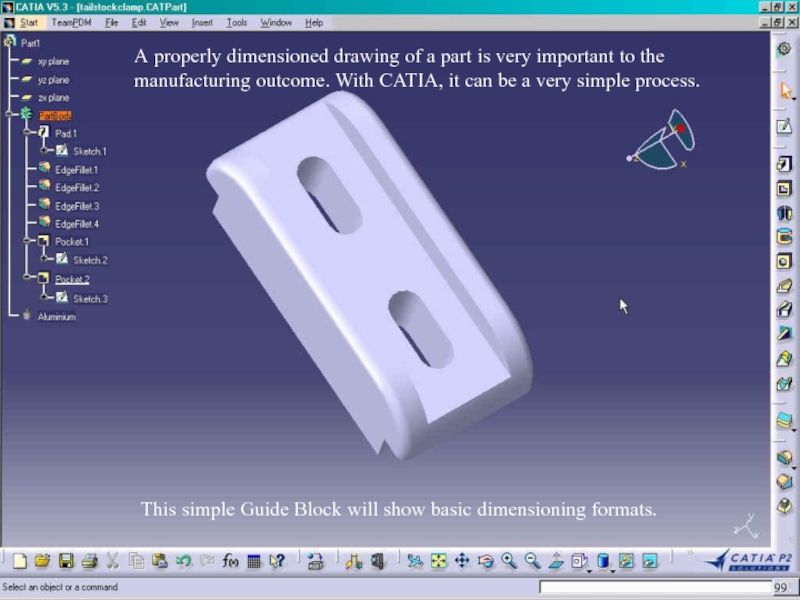
- 2. A properly dimensioned drawing of a part
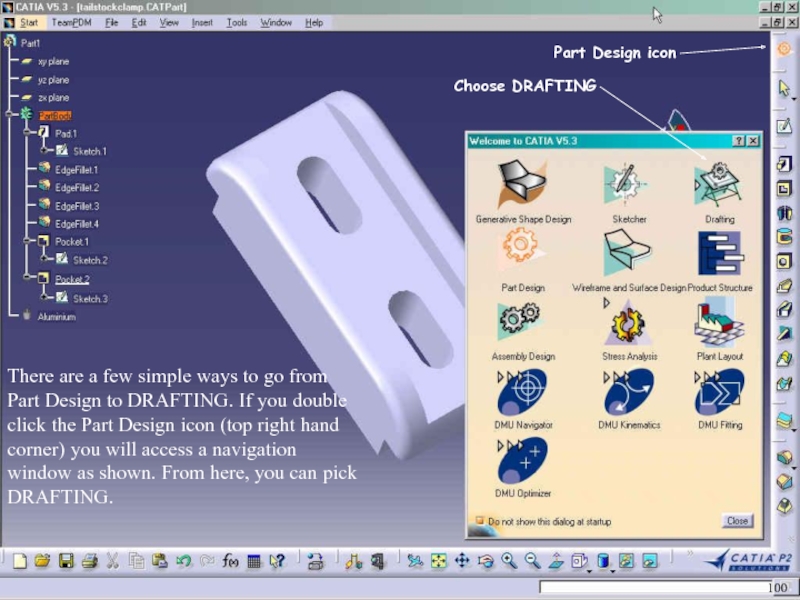
- 3. There are a few simple ways to
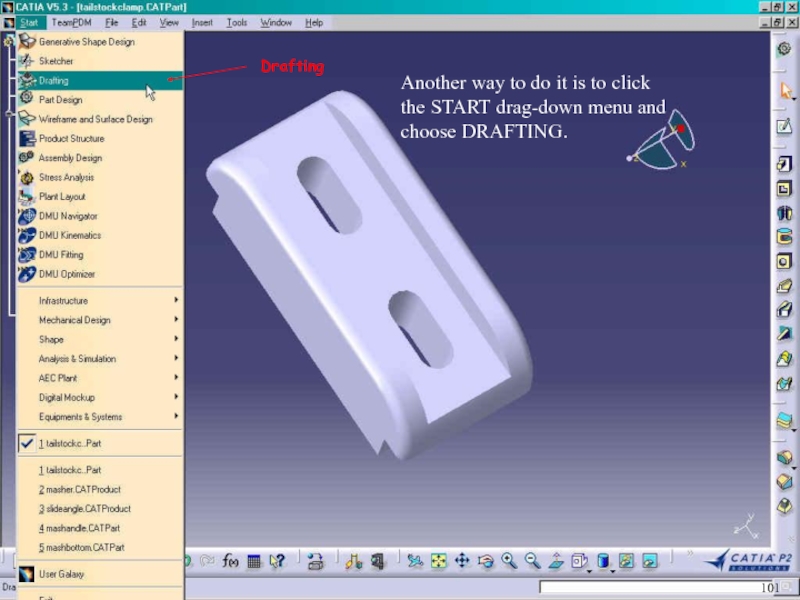
- 4. Another way to do it is to
- 5. The NEW DRAWING CREATION dialog box will
- 6. Quickly the drawing is generated. All of
- 7. Click on DIMENSIONING from the toolbar… …And
- 8. If default is DIAMETER, this is what
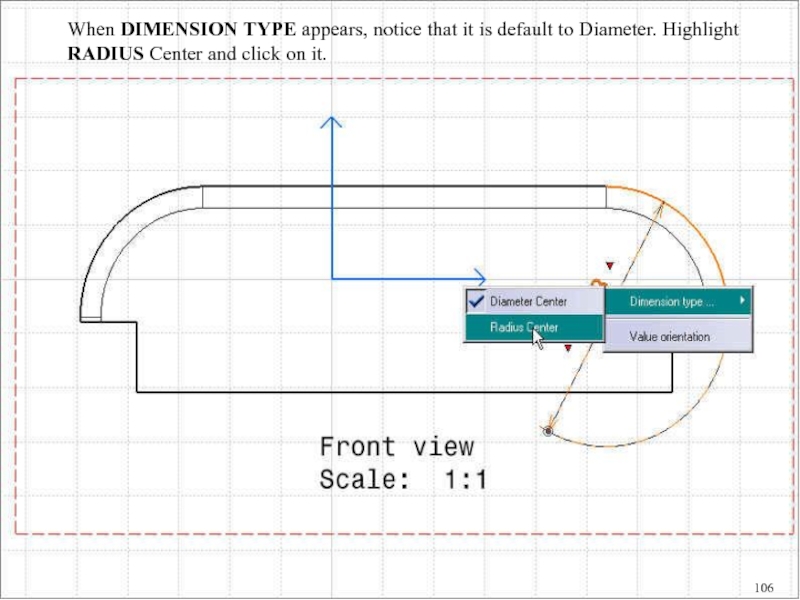
- 9. When DIMENSION TYPE appears, notice that it
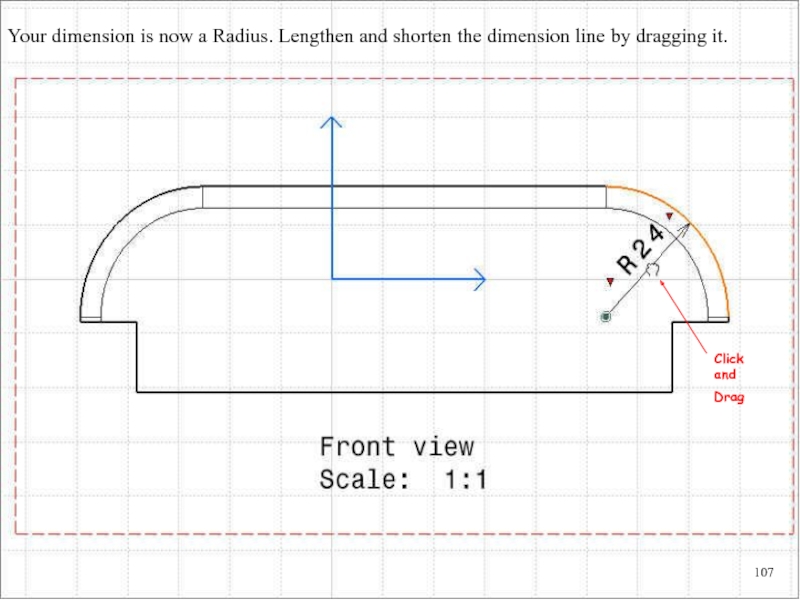
- 10. Your dimension is now a Radius.
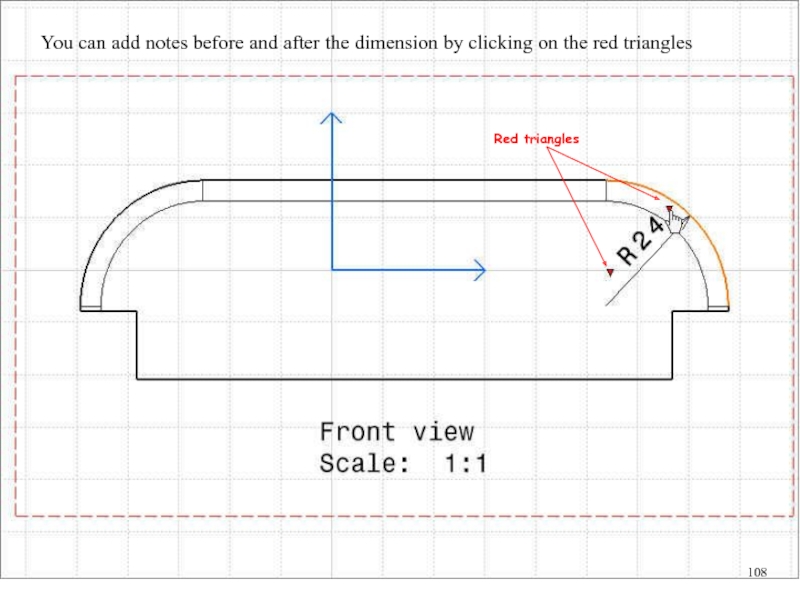
- 11. You can add notes before and after
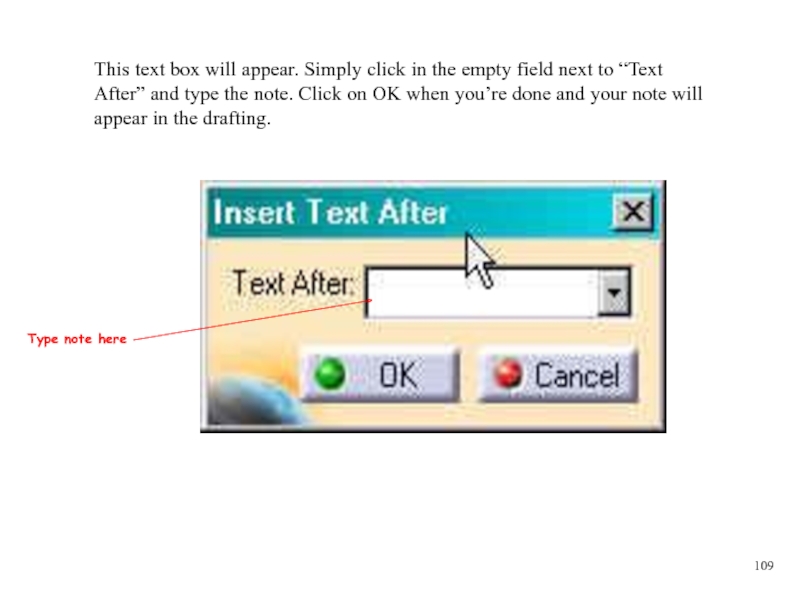
- 12. This text box will appear. Simply click
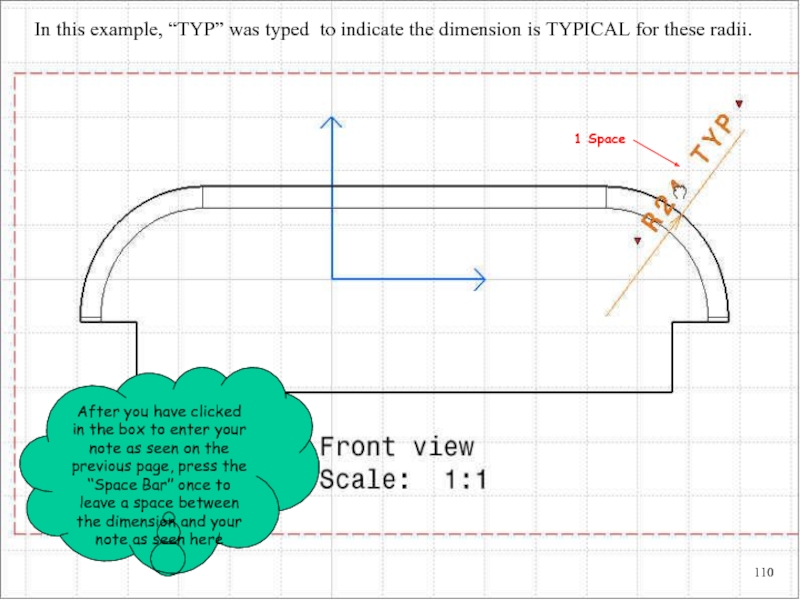
- 13. In this example, “TYP” was typed to
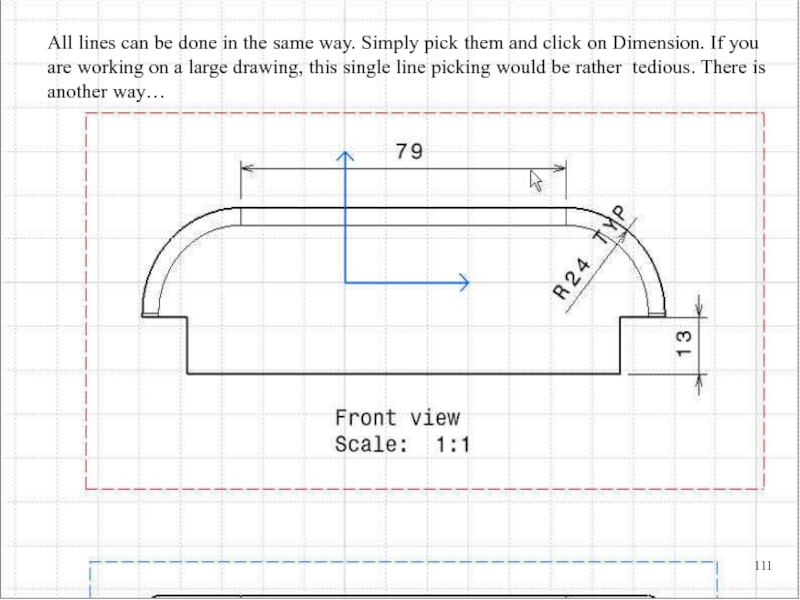
- 14. All lines can be done in the
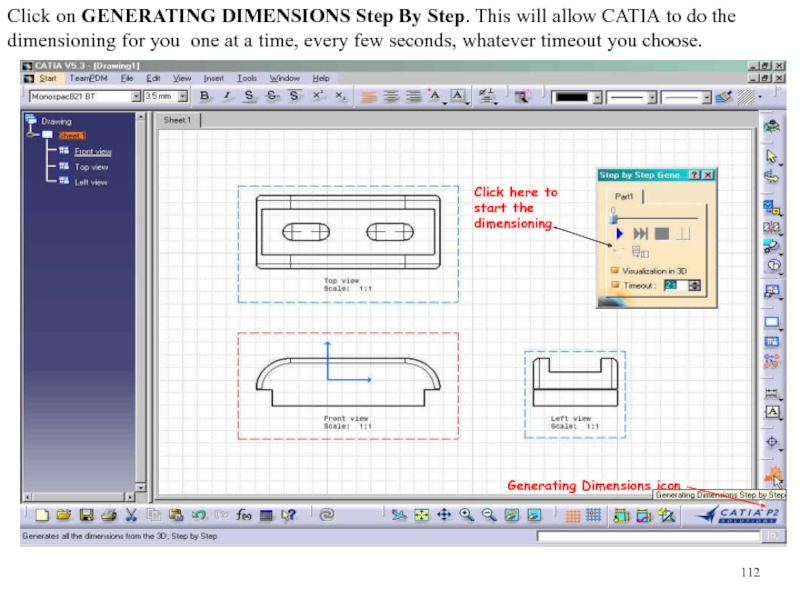
- 15. Click on GENERATING DIMENSIONS Step By Step.
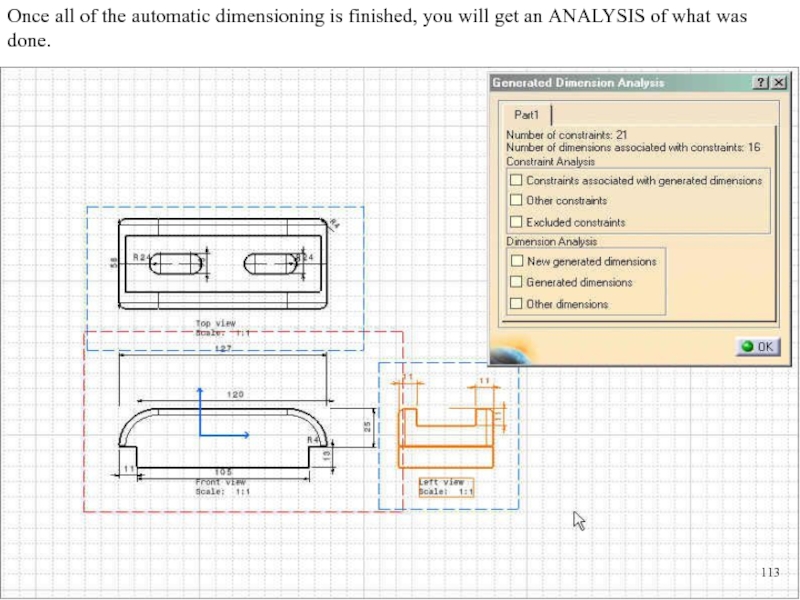
- 16. Once all of the automatic dimensioning is
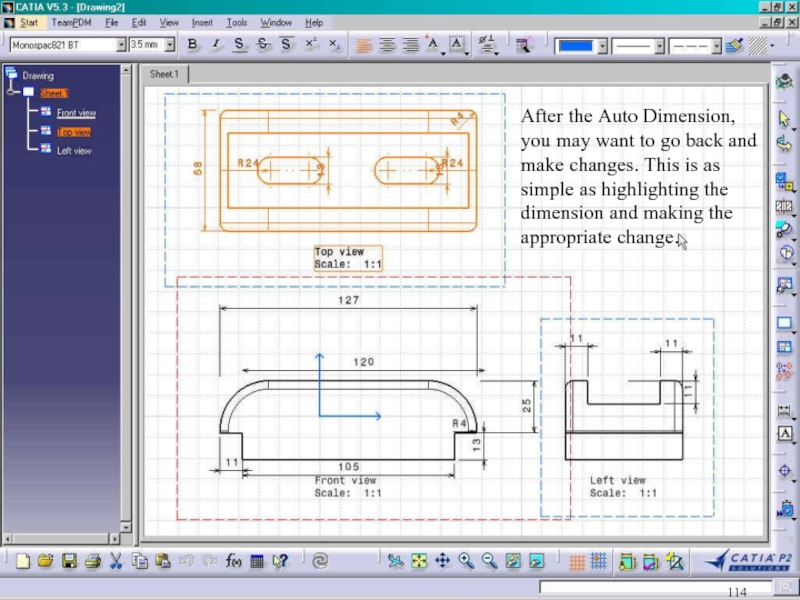
- 17. After the Auto Dimension, you may want
Слайд 2A properly dimensioned drawing of a part is very important to
This simple Guide Block will show basic dimensioning formats.
99
Слайд 3There are a few simple ways to go from Part Design
Part Design icon
Choose DRAFTING
100
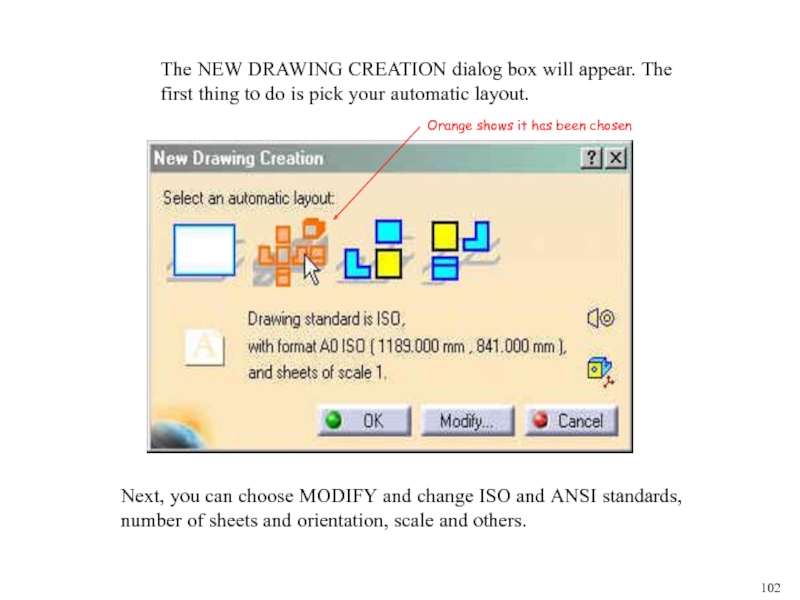
Слайд 5The NEW DRAWING CREATION dialog box will appear. The first thing
Next, you can choose MODIFY and change ISO and ANSI standards, number of sheets and orientation, scale and others.
Orange shows it has been chosen
102
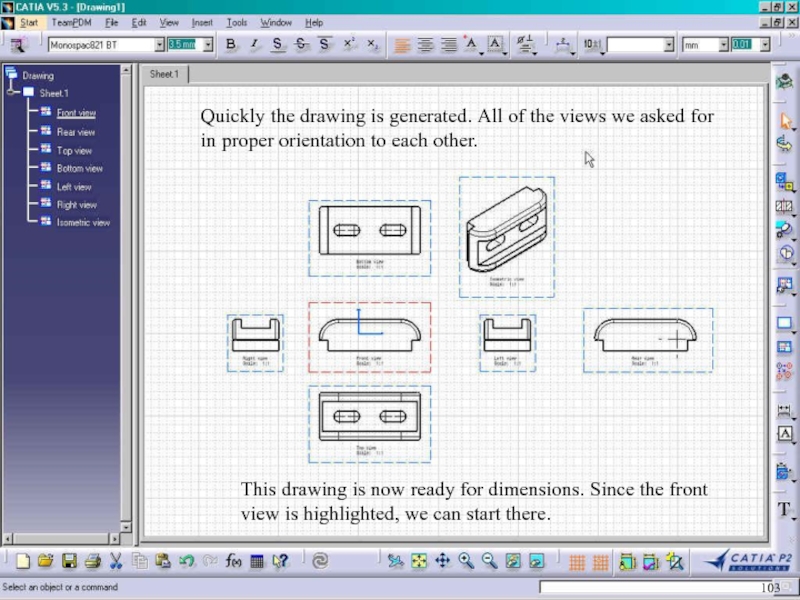
Слайд 6Quickly the drawing is generated. All of the views we asked
This drawing is now ready for dimensions. Since the front view is highlighted, we can start there.
103
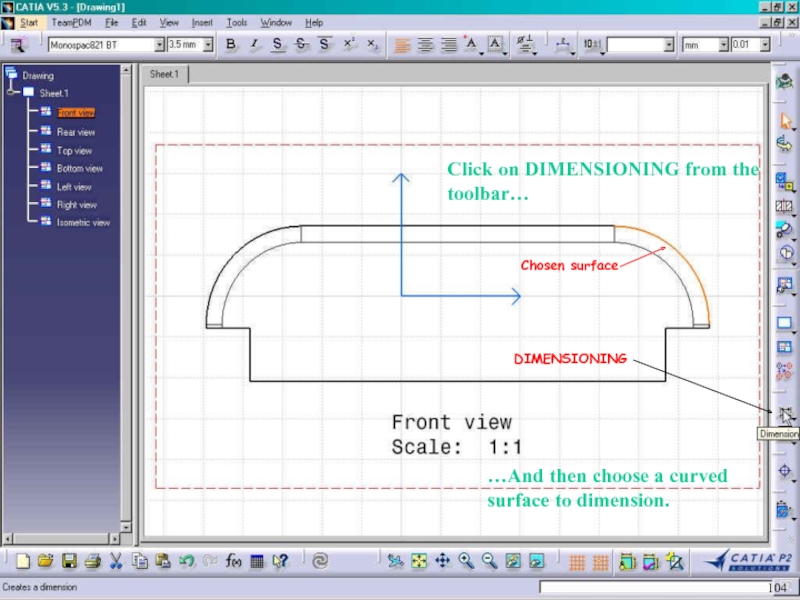
Слайд 7Click on DIMENSIONING from the toolbar…
…And then choose a curved surface
Chosen surface
DIMENSIONING
104
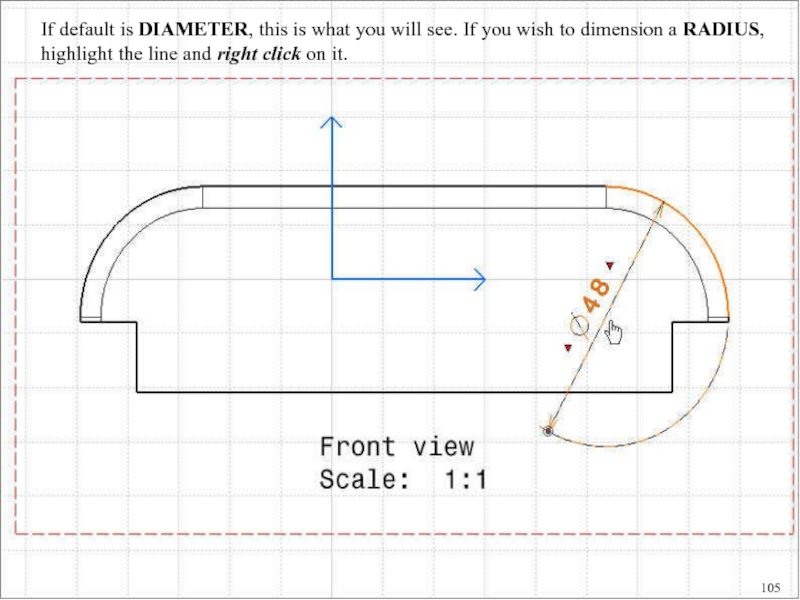
Слайд 8If default is DIAMETER, this is what you will see. If
105
Слайд 9When DIMENSION TYPE appears, notice that it is default to Diameter.
106
Слайд 10
Your dimension is now a Radius. Lengthen and shorten the dimension
Click and
Drag
107
Слайд 11You can add notes before and after the dimension by clicking
Red triangles
108
Слайд 12This text box will appear. Simply click in the empty field
Type note here
109
Слайд 13In this example, “TYP” was typed to indicate the dimension is
After you have clicked in the box to enter your note as seen on the previous page, press the “Space Bar” once to leave a space between the dimension and your note as seen here
1 Space
110
Слайд 14All lines can be done in the same way. Simply pick
111
Слайд 15Click on GENERATING DIMENSIONS Step By Step. This will allow CATIA
Generating Dimensions icon
Click here to start the dimensioning.
112
Слайд 16Once all of the automatic dimensioning is finished, you will get
113
Слайд 17After the Auto Dimension, you may want to go back and
114
