- Главная
- Разное
- Дизайн
- Бизнес и предпринимательство
- Аналитика
- Образование
- Развлечения
- Красота и здоровье
- Финансы
- Государство
- Путешествия
- Спорт
- Недвижимость
- Армия
- Графика
- Культурология
- Еда и кулинария
- Лингвистика
- Английский язык
- Астрономия
- Алгебра
- Биология
- География
- Детские презентации
- Информатика
- История
- Литература
- Маркетинг
- Математика
- Медицина
- Менеджмент
- Музыка
- МХК
- Немецкий язык
- ОБЖ
- Обществознание
- Окружающий мир
- Педагогика
- Русский язык
- Технология
- Физика
- Философия
- Химия
- Шаблоны, картинки для презентаций
- Экология
- Экономика
- Юриспруденция
How to apply NLA-5&15S Preset презентация
Содержание
- 1. How to apply NLA-5&15S Preset
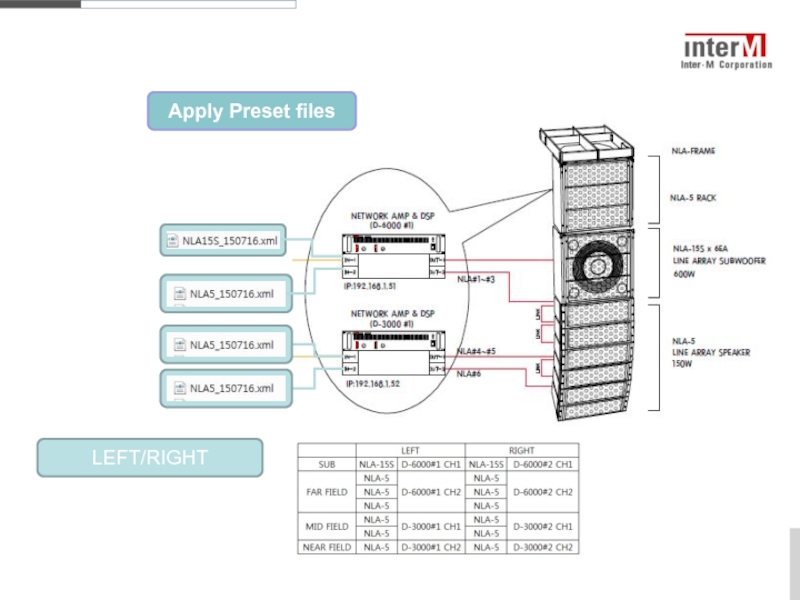
- 2. Apply Preset files LEFT/RIGHT
- 3. D-3000 Set up
- 4. NLA-5(4EA)and NLA-15S are compatible
- 5. D-3000 Web GUI Connection -1- Since
- 6. D-3000 Web GUI Connection -2- The
- 7. D-3000 Web GUI Connection -2- Type D-Series IP (default: 192.168.1.99) in Internet address bar.
- 8. D-3000 Web GUI Connection -2- If you
- 9. How to Apply NLA-5 Preset
- 10. How to Apply NLA-5 Preset -1- Select
- 11. How to Apply NLA-5 Preset -2- Channel
- 12. How to Apply NLA-5 Preset -3- Press
- 13. How to Apply NLA-5 Preset -4- Press
- 14. How to Apply NLA-5 Preset -5- You
Слайд 4
NLA-5(4EA)and NLA-15S are compatible to one D-3000.
You should know the IP address for your D-3000 device to set up DSP.
Please check the light is blinking when you connect Control terminal and Dante terminal to LAN cable.
Checklist
Слайд 5D-3000 Web GUI Connection -1-
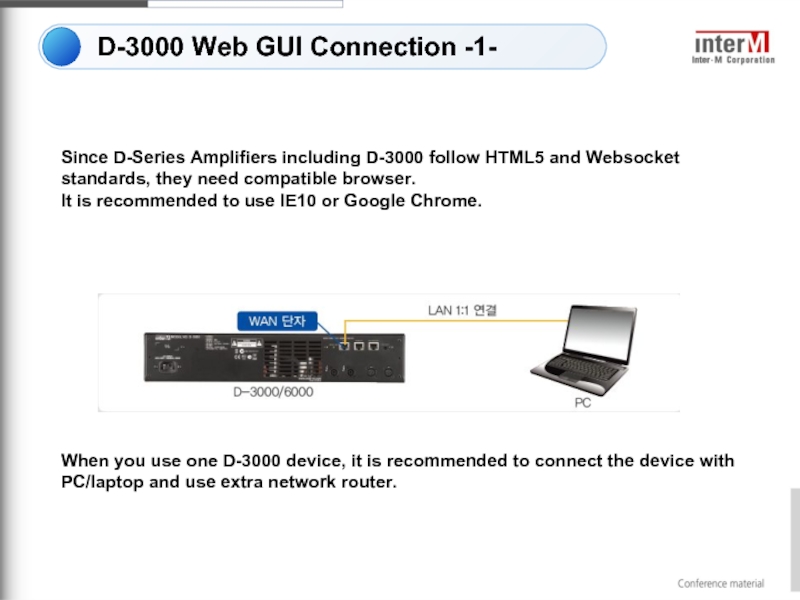
Since D-Series Amplifiers including D-3000 follow HTML5
It is recommended to use IE10 or Google Chrome.
When you use one D-3000 device, it is recommended to connect the device with PC/laptop and use extra network router.
Слайд 6D-3000 Web GUI Connection -2-
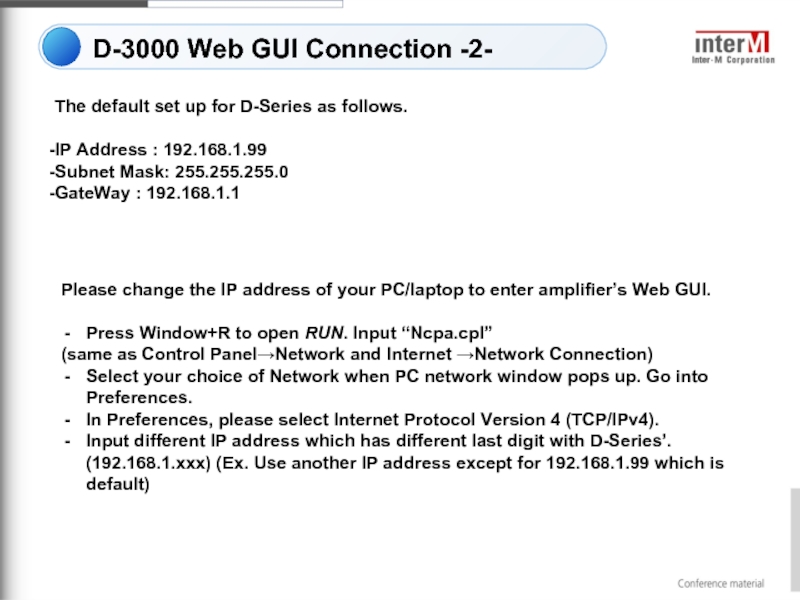
The default set up for D-Series as
IP Address : 192.168.1.99
Subnet Mask: 255.255.255.0
GateWay : 192.168.1.1
Please change the IP address of your PC/laptop to enter amplifier’s Web GUI.
Press Window+R to open RUN. Input “Ncpa.cpl”
(same as Control Panel→Network and Internet →Network Connection)
Select your choice of Network when PC network window pops up. Go into Preferences.
In Preferences, please select Internet Protocol Version 4 (TCP/IPv4).
Input different IP address which has different last digit with D-Series’. (192.168.1.xxx) (Ex. Use another IP address except for 192.168.1.99 which is default)
Слайд 7D-3000 Web GUI Connection -2-
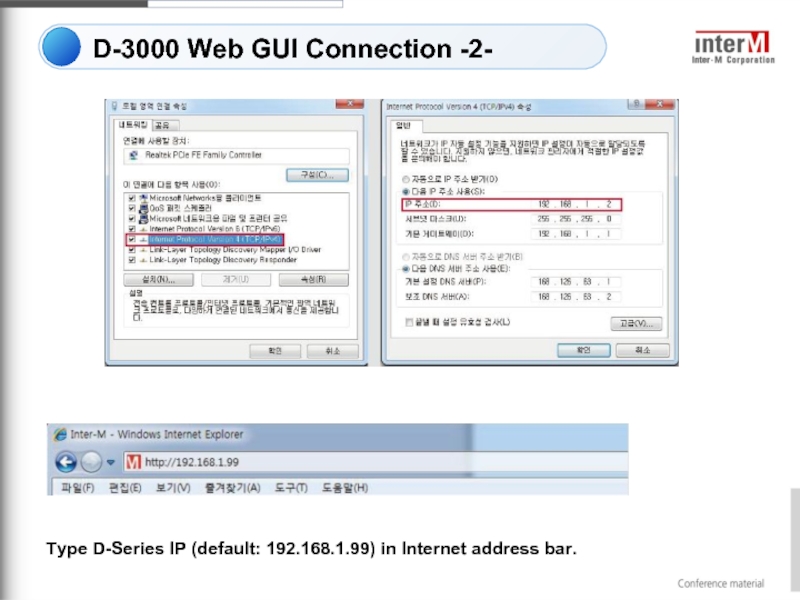
Type D-Series IP (default: 192.168.1.99) in Internet
Слайд 8D-3000 Web GUI Connection -2-
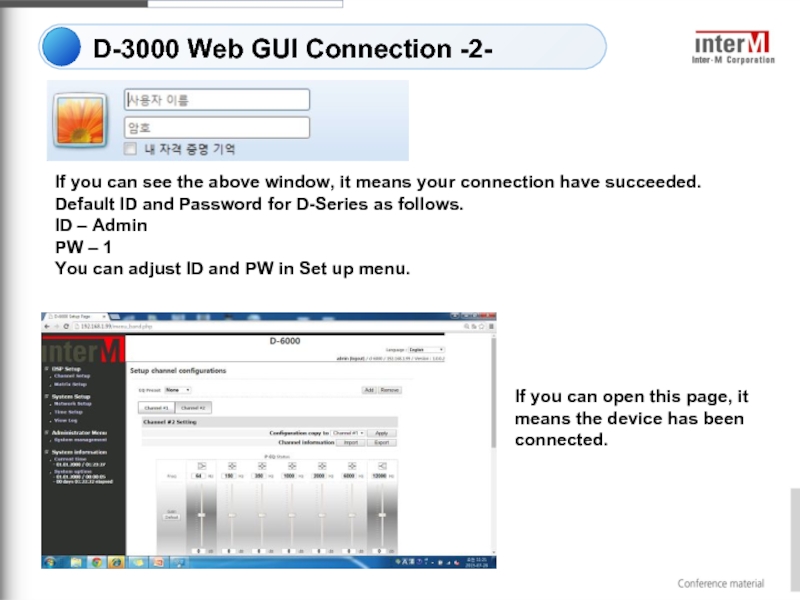
If you can see the above window,
Default ID and Password for D-Series as follows.
ID – Admin
PW – 1
You can adjust ID and PW in Set up menu.
If you can open this page, it means the device has been connected.
Слайд 10How to Apply NLA-5 Preset -1-
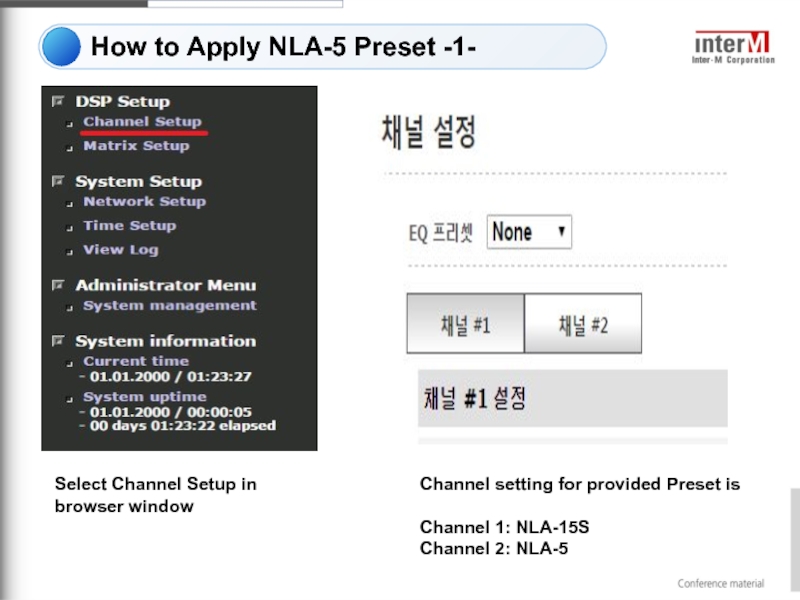
Select Channel Setup in browser window
Channel
Channel 1: NLA-15S
Channel 2: NLA-5
Слайд 11How to Apply NLA-5 Preset -2-
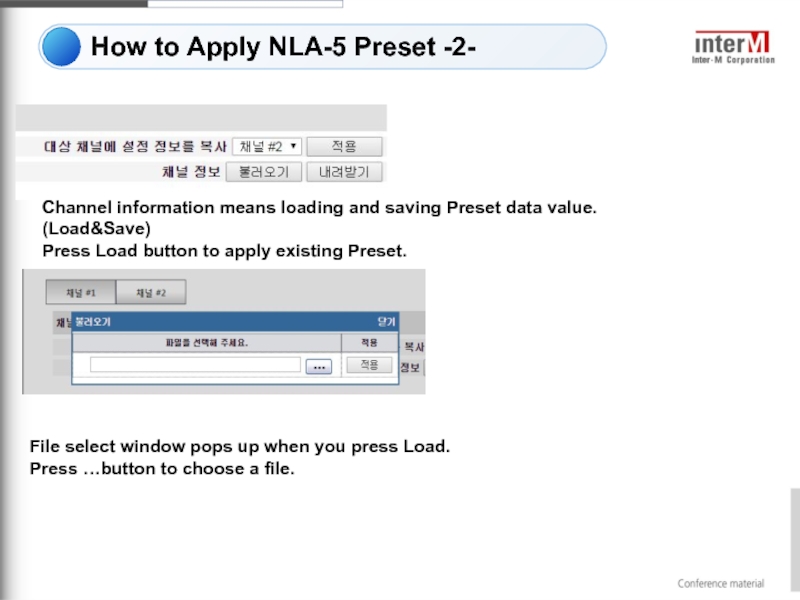
Channel information means loading and saving
Press Load button to apply existing Preset.
File select window pops up when you press Load.
Press …button to choose a file.
Слайд 12How to Apply NLA-5 Preset -3-
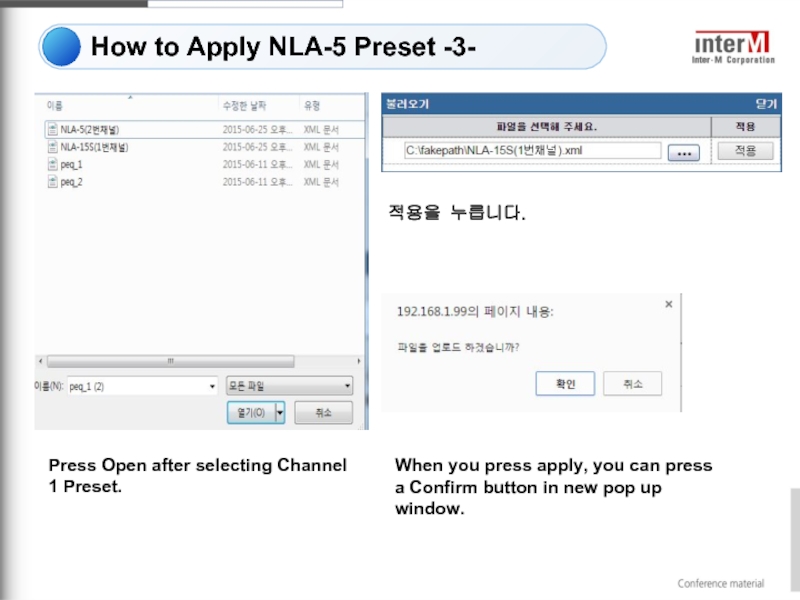
Press Open after selecting Channel 1
적용을 누릅니다.
When you press apply, you can press a Confirm button in new pop up window.
Слайд 13How to Apply NLA-5 Preset -4-
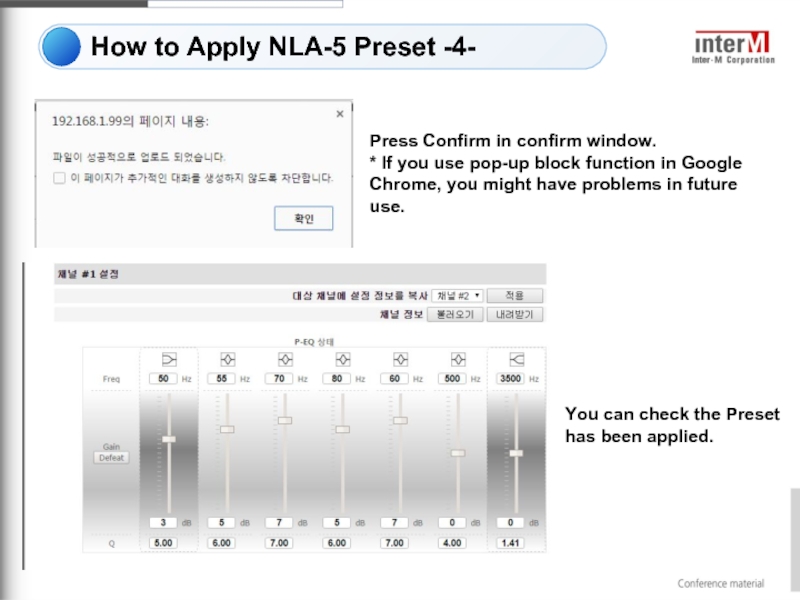
Press Confirm in confirm window.
* If
You can check the Preset has been applied.
Слайд 14How to Apply NLA-5 Preset -5-
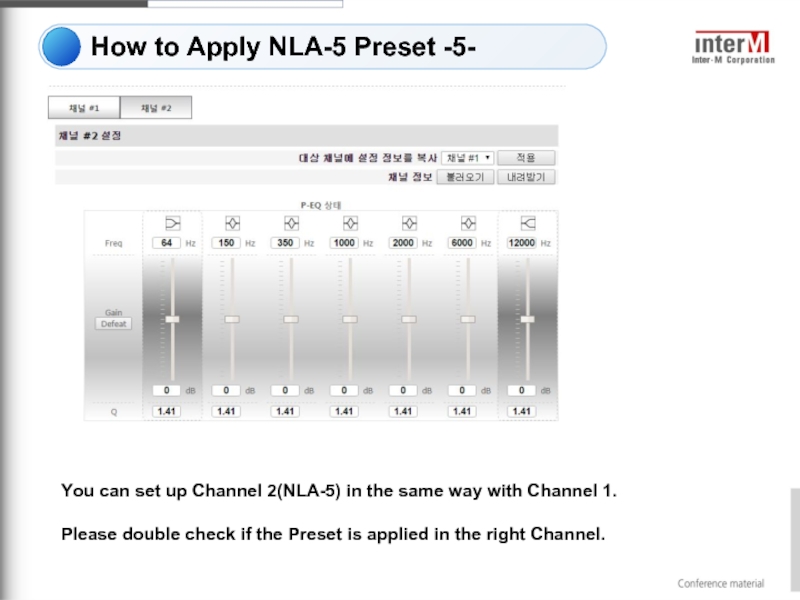
You can set up Channel 2(NLA-5)
Please double check if the Preset is applied in the right Channel.
