- Главная
- Разное
- Дизайн
- Бизнес и предпринимательство
- Аналитика
- Образование
- Развлечения
- Красота и здоровье
- Финансы
- Государство
- Путешествия
- Спорт
- Недвижимость
- Армия
- Графика
- Культурология
- Еда и кулинария
- Лингвистика
- Английский язык
- Астрономия
- Алгебра
- Биология
- География
- Детские презентации
- Информатика
- История
- Литература
- Маркетинг
- Математика
- Медицина
- Менеджмент
- Музыка
- МХК
- Немецкий язык
- ОБЖ
- Обществознание
- Окружающий мир
- Педагогика
- Русский язык
- Технология
- Физика
- Философия
- Химия
- Шаблоны, картинки для презентаций
- Экология
- Экономика
- Юриспруденция
BIOS FW SOP For win 8 презентация
Содержание
- 1. BIOS FW SOP For win 8
- 2. Prepare USB Bootable
- 3. Step 1 Prepare one USB disk.
- 4. Step 2 You can see HPUSBFW.rar under
- 5. Step 3 Connect your USB disk with
- 6. Step 4 Checking Device whether show your
- 7. Test 1 power on the system and
- 8. Test 2 Plug in USB bootable disk
- 9. Test 3 Select USB bootable disk and let system boot to DOS mode.
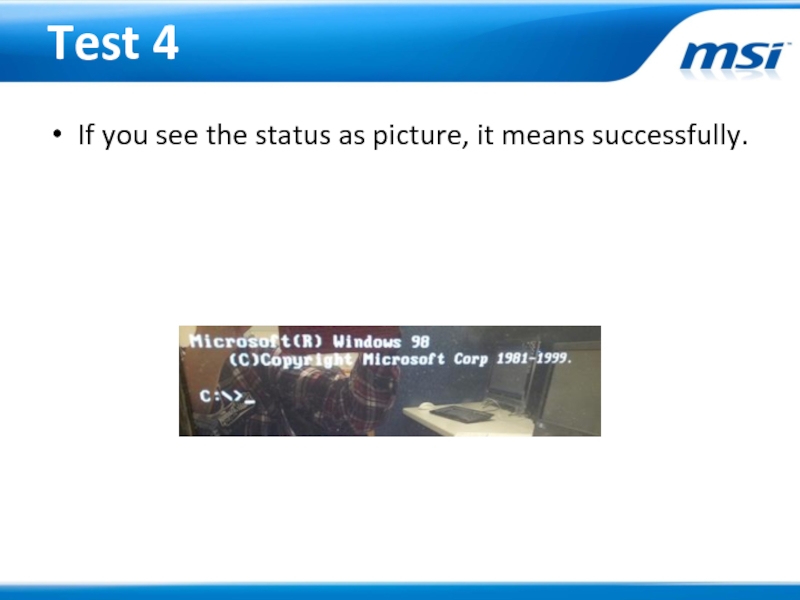
- 10. Test 4 If you see the status as picture, it means successfully.
- 11. Prepare The latest BIOS
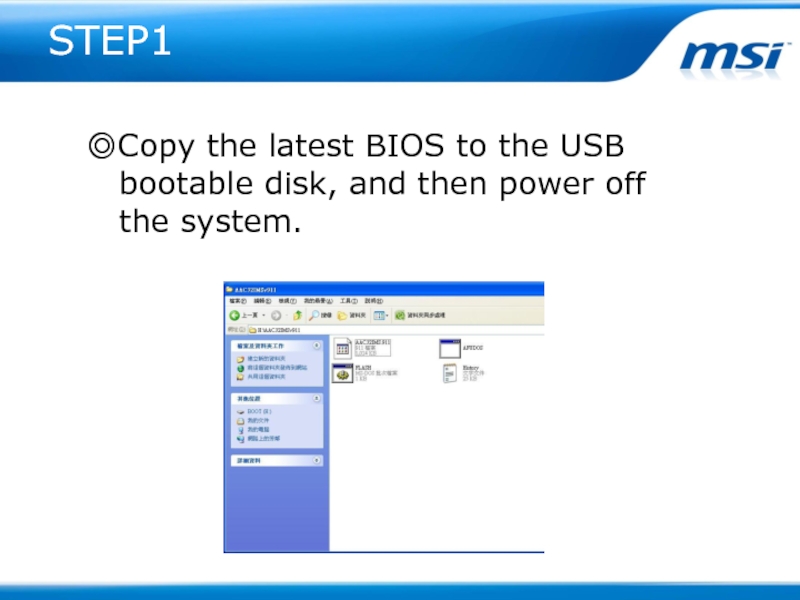
- 12. STEP1 ◎Copy the latest BIOS to
- 13. STEP2 power on the system and
- 14. STEP3 ◎ Plug in USB bootable
- 15. STEP4 ◎ Press “F11” to select
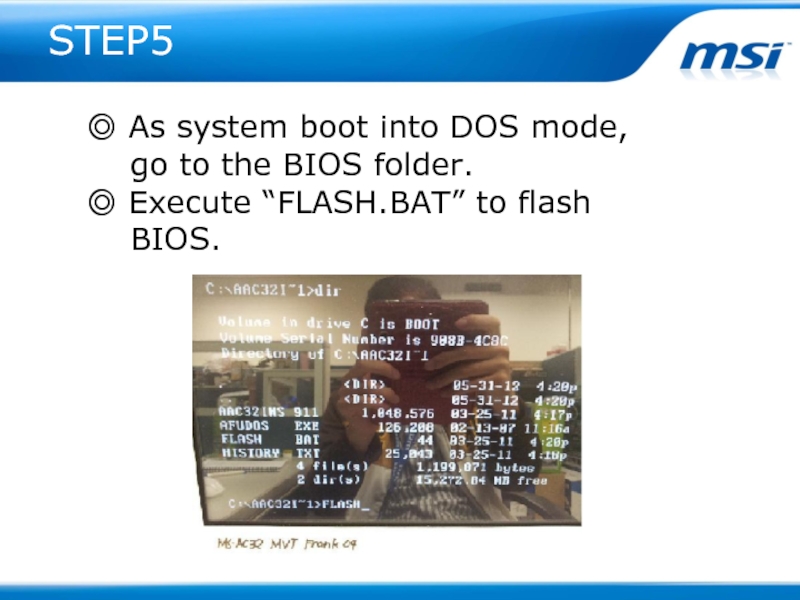
- 16. STEP5 ◎ As system boot into
- 17. STEP 6 NOTE. Do not
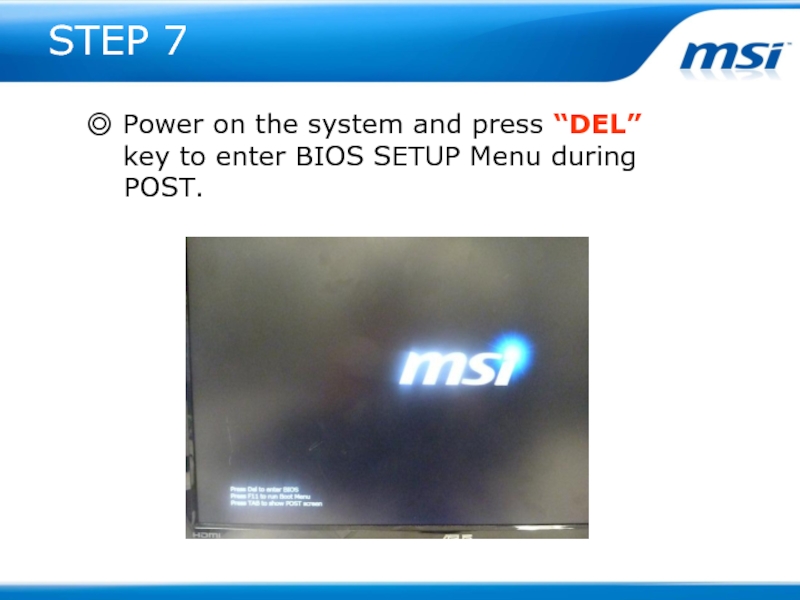
- 18. STEP 7 ◎ Power on the system
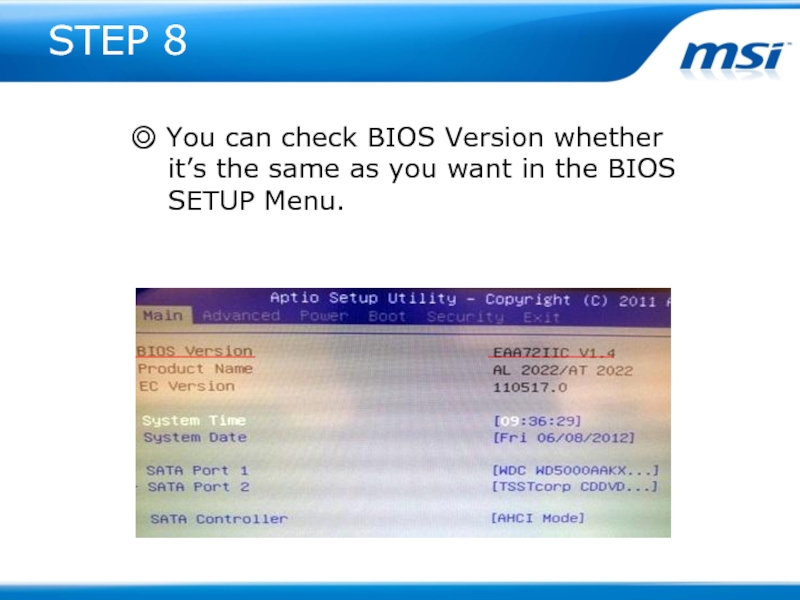
- 19. STEP 8 ◎ You can check BIOS
- 20. STEP 9 ◎ Go to “BIOS /
- 21. STEP 10 ◎ Go to “BIOS /
- 22. Thanks for your attention
Слайд 3Step 1
Prepare one USB disk.
Find HPUSBFW as below link and download
it to desktop.
http://www.msi.com/service/download/firmware-23301.html
http://www.msi.com/service/download/firmware-23301.html
Слайд 4Step 2
You can see HPUSBFW.rar under desktop and please extract it.
It must have 2 files in HPUSBFW folder.
Слайд 5Step 3
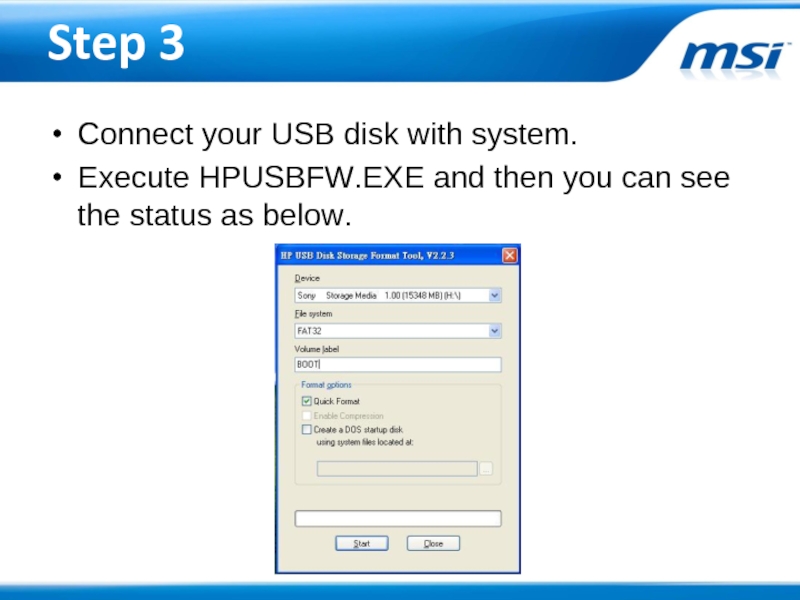
Connect your USB disk with system.
Execute HPUSBFW.EXE and then you
can see the status as below.
Слайд 6Step 4
Checking Device whether show your USB disk .
Select FAT 32
on “File system”.
Name the volume label like picture.
Select “Quick Format” and
“create a DOS startup disk”.
Choose the HPUSBFW folder
and then press start button
to create it.
Name the volume label like picture.
Select “Quick Format” and
“create a DOS startup disk”.
Choose the HPUSBFW folder
and then press start button
to create it.
Слайд 7Test 1
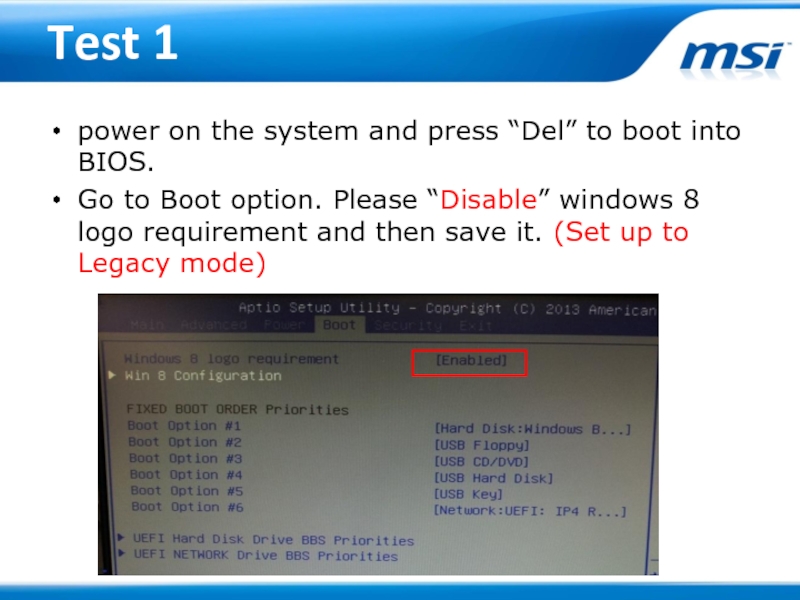
power on the system and press “Del” to boot into
BIOS.
Go to Boot option. Please “Disable” windows 8 logo requirement and then save it. (Set up to Legacy mode)
Go to Boot option. Please “Disable” windows 8 logo requirement and then save it. (Set up to Legacy mode)
Слайд 8Test 2
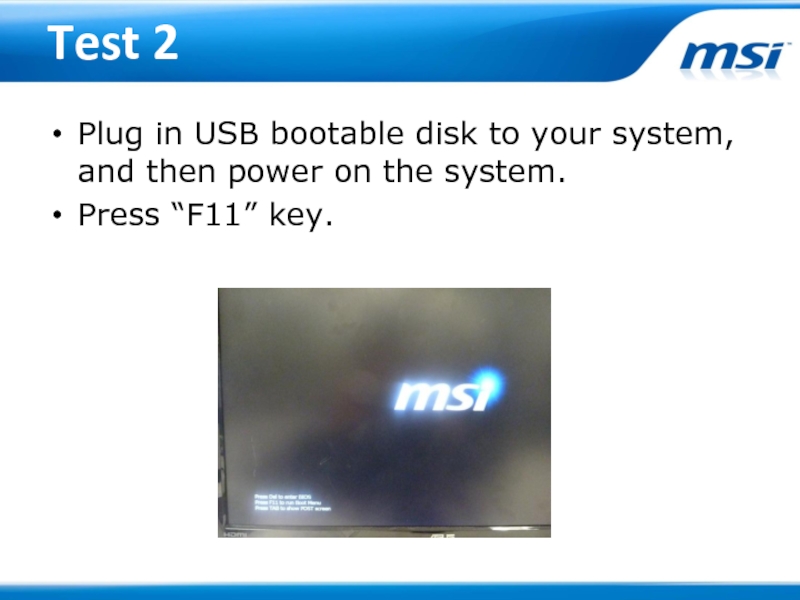
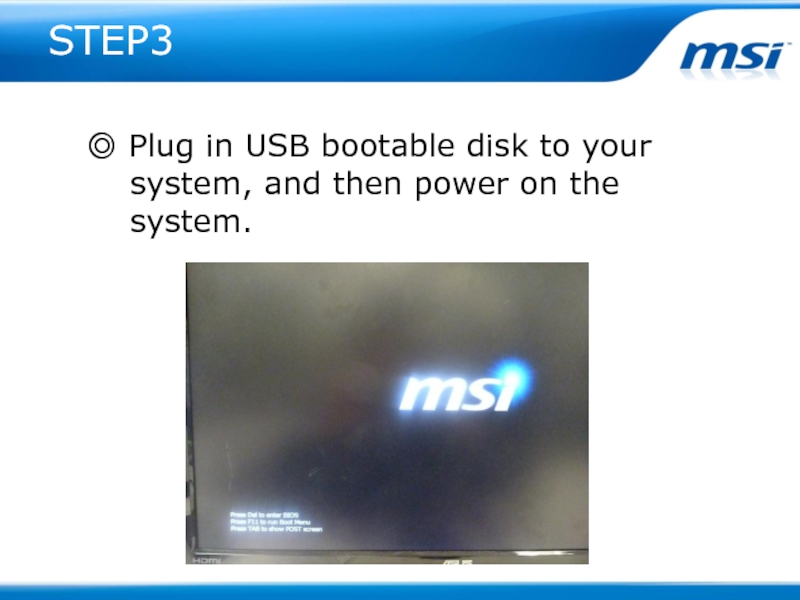
Plug in USB bootable disk to your system, and then
power on the system.
Press “F11” key.
Press “F11” key.
Слайд 13STEP2
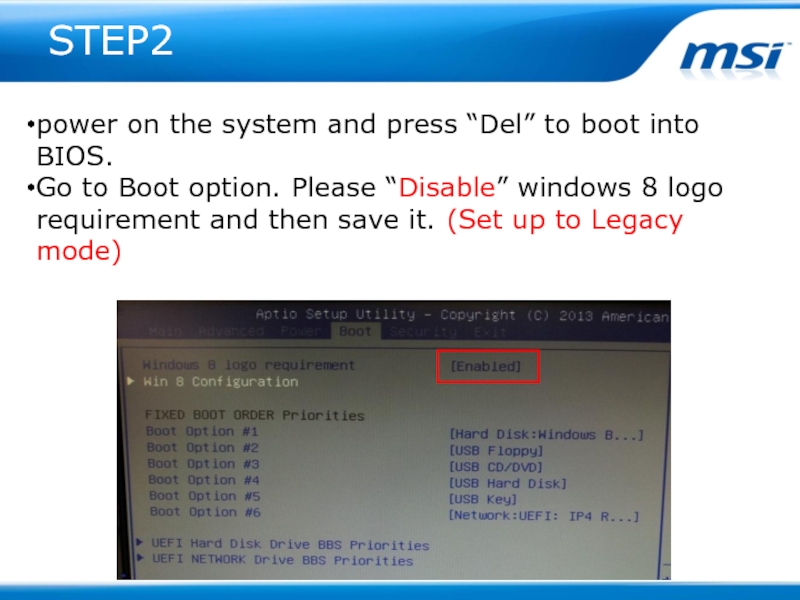
power on the system and press “Del” to boot into
BIOS.
Go to Boot option. Please “Disable” windows 8 logo requirement and then save it. (Set up to Legacy mode)
Go to Boot option. Please “Disable” windows 8 logo requirement and then save it. (Set up to Legacy mode)
Слайд 15STEP4
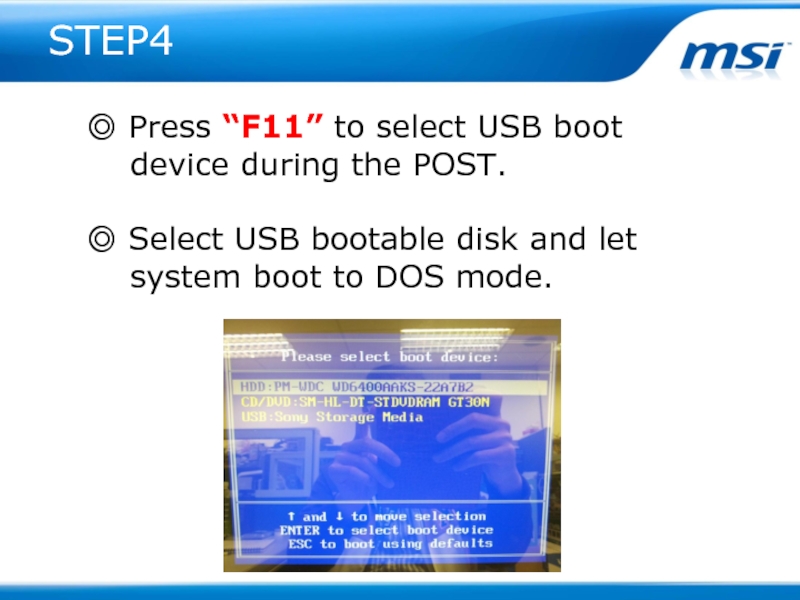
◎ Press “F11” to select USB boot
device
during the POST.
◎ Select USB bootable disk and let
system boot to DOS mode.
◎ Select USB bootable disk and let
system boot to DOS mode.
Слайд 16STEP5
◎ As system boot into DOS mode,
go
to the BIOS folder.
◎ Execute “FLASH.BAT” to flash
BIOS.
◎ Execute “FLASH.BAT” to flash
BIOS.
Слайд 17STEP 6
NOTE.
Do not remove the power cable or
power off the system during BIOS
Flash process.
◎ If BIOS flash successfully, please
remove all powers of this system,
and power on again.
Flash process.
◎ If BIOS flash successfully, please
remove all powers of this system,
and power on again.
Слайд 19STEP 8
◎ You can check BIOS Version whether
it’s
the same as you want in the BIOS
SETUP Menu.
SETUP Menu.
Слайд 20STEP 9
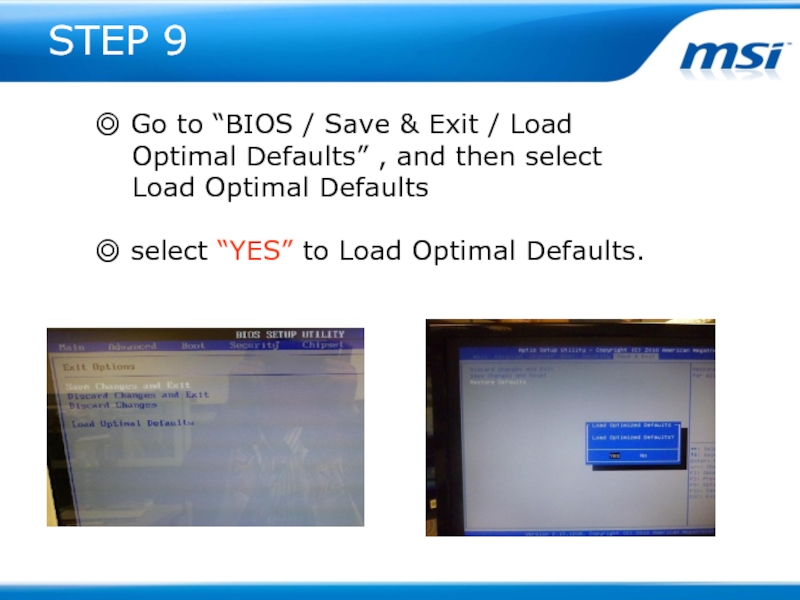
◎ Go to “BIOS / Save & Exit / Load
Optimal Defaults” , and then select
Load Optimal Defaults
◎ select “YES” to Load Optimal Defaults.
Слайд 21STEP 10
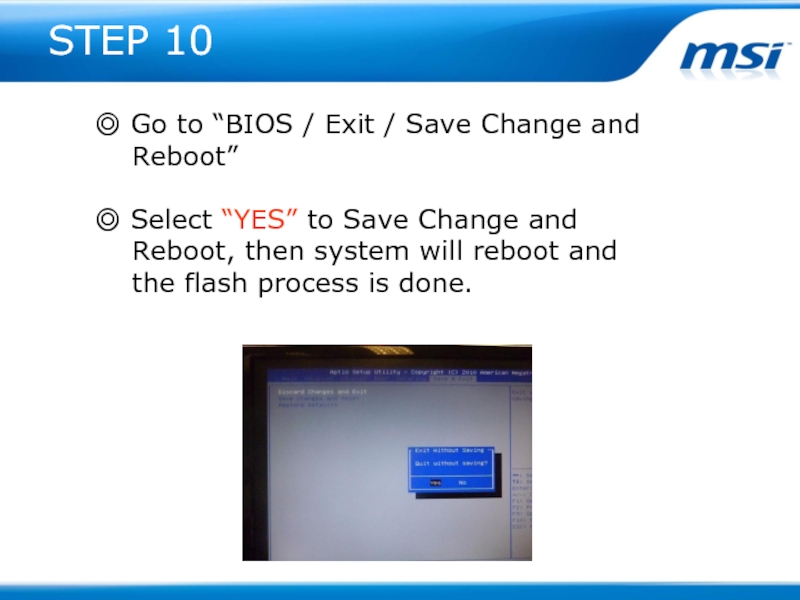
◎ Go to “BIOS / Exit / Save Change and
Reboot”
◎ Select “YES” to Save Change and
Reboot, then system will reboot and
the flash process is done.
