- Главная
- Разное
- Дизайн
- Бизнес и предпринимательство
- Аналитика
- Образование
- Развлечения
- Красота и здоровье
- Финансы
- Государство
- Путешествия
- Спорт
- Недвижимость
- Армия
- Графика
- Культурология
- Еда и кулинария
- Лингвистика
- Английский язык
- Астрономия
- Алгебра
- Биология
- География
- Детские презентации
- Информатика
- История
- Литература
- Маркетинг
- Математика
- Медицина
- Менеджмент
- Музыка
- МХК
- Немецкий язык
- ОБЖ
- Обществознание
- Окружающий мир
- Педагогика
- Русский язык
- Технология
- Физика
- Философия
- Химия
- Шаблоны, картинки для презентаций
- Экология
- Экономика
- Юриспруденция
Small Business. Level 1 survival guide презентация
Содержание
- 1. Small Business. Level 1 survival guide
- 2. Goals
- 3. First call: Onboarding SB Number of mailboxes
- 4. Step 1. Create account objects Exchange CSVDE
- 5. Step 2. Adjust mail flow Explain what
- 6. Step 3. Data transfer. Exchange Exchange Platform:
- 7. TEST RPC over HTTP settings Test OWA
- 8. Settings in OWA
- 9. Direct MAPI If the RPC over
- 10. Step 3. Data transfer. IMAP/POP IMAP A.
- 11. Step 4. Cutover From Intermedia side
- 12. Step 5. End of Onboarding Customer
- 13. Editing cases in footprints Engaged box checked
- 14. Use Intermedia ‘right now’ If customers want
- 15. Frequently asked questions How long the
- 16. Onboarding Tools
- 17. Case creation - Log into
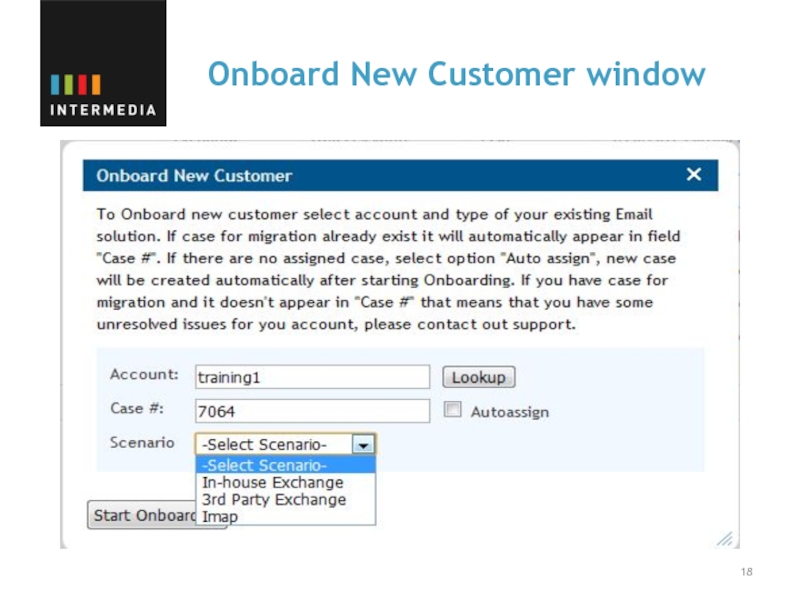
- 18. Onboard New Customer window
- 19. EXCHANGE MIGRATION
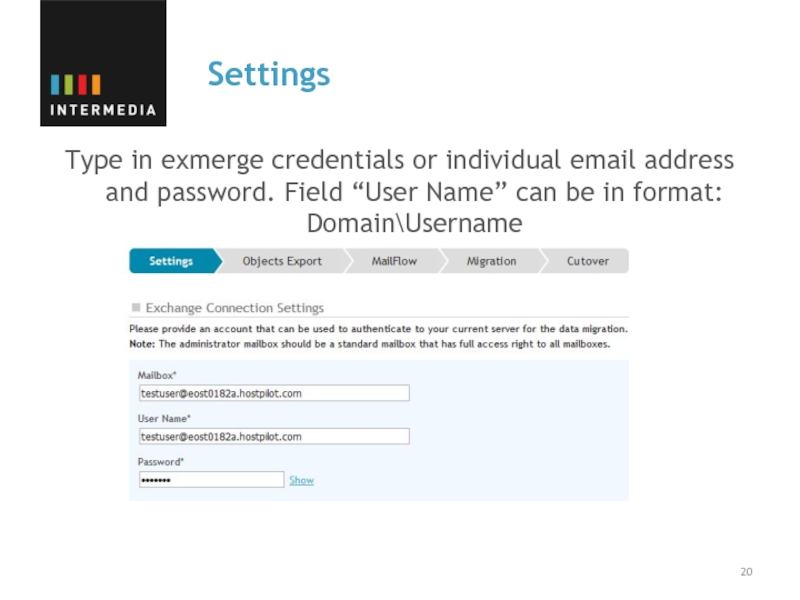
- 20. Settings Type in exmerge credentials or individual
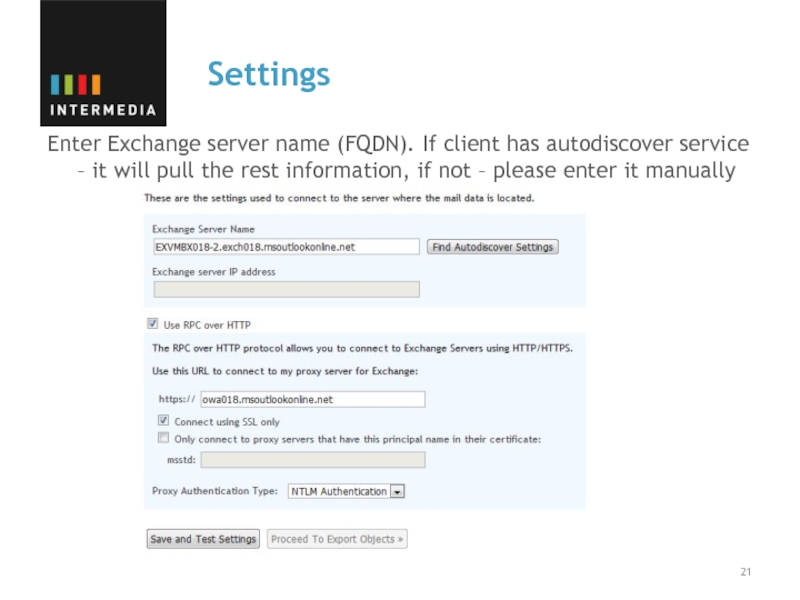
- 21. Settings Enter Exchange server name (FQDN). If
- 22. Save and test settings Check settings and
- 23. Starting Objects Export You can either export
- 24. Object Export process You can view details
- 25. Preview AD Objects You can choose what
- 26. Managing individual users You can specify individual
- 27. Mailflow You can choose option whether redirection is needed or not
- 28. Starting Migration process You can start data
- 29. Account Objects creation Details about all objects
- 30. Export content Firstly, we export data to
- 31. Export content details View details for each mailbox
- 32. Import Content Once export is completed, import
- 33. Single Sign On Once the imports
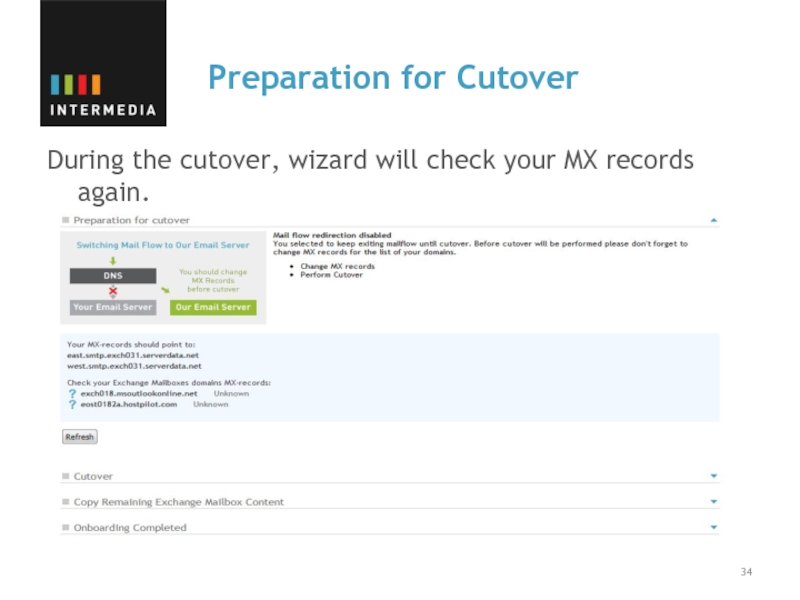
- 34. Preparation for Cutover During the cutover, wizard will check your MX records again.
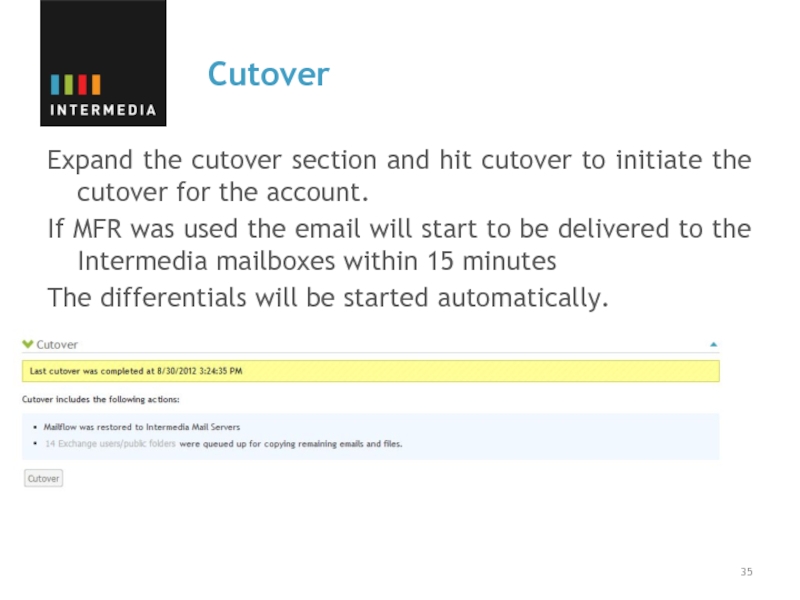
- 35. Cutover Expand the cutover section and
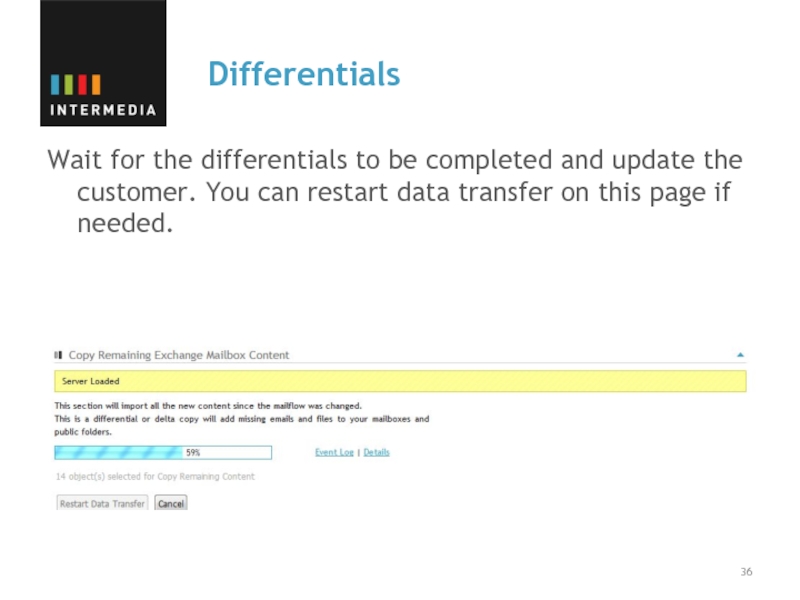
- 36. Differentials Wait for the differentials
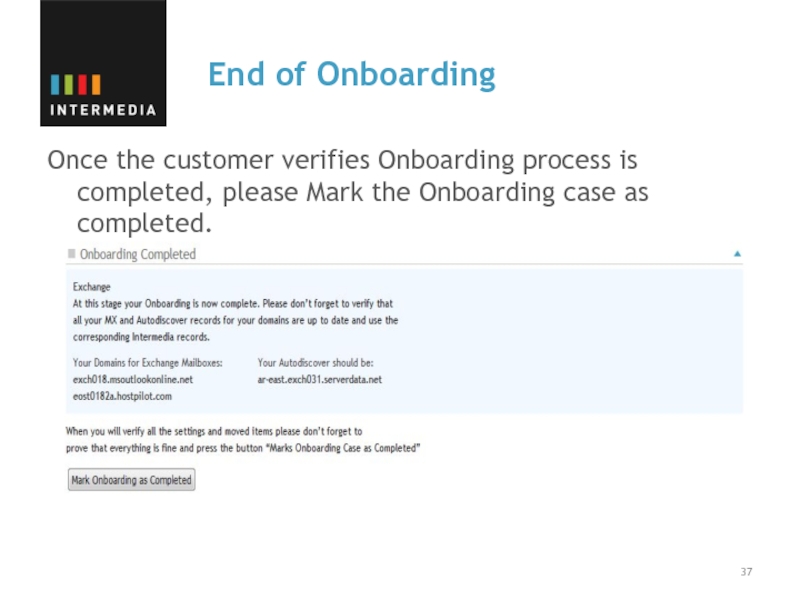
- 37. End of Onboarding Once the
- 38. IMAP MIGRATION
- 39. Settings Please fill all the fields with
- 40. Objects export Please upload CSV file containing
- 41. CSV Template Here is the way it
- 42. Mailflow In case mail redirection is needed,
- 43. Starting Migration process You can start data
- 44. Account object creation Firstly, wizard will create
- 45. Transfer IMAP Content IMAP migration will be
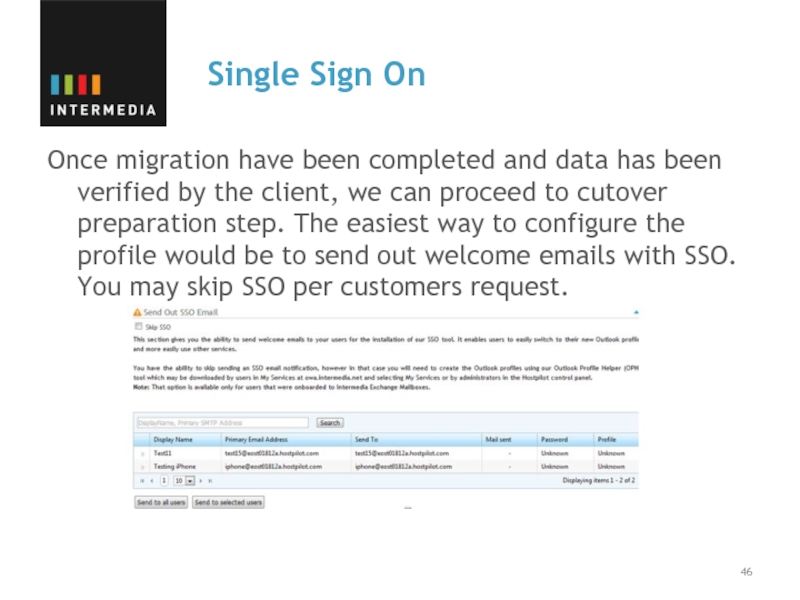
- 46. Single Sign On Once migration have
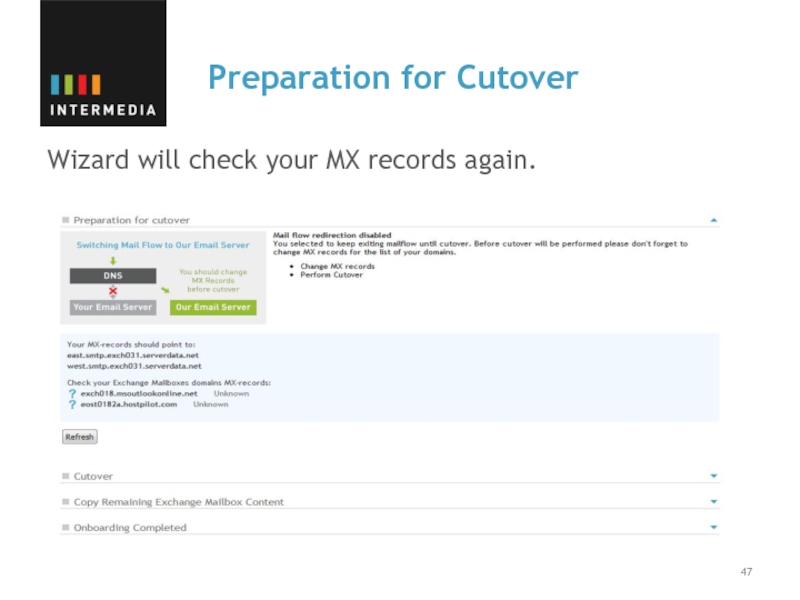
- 47. Preparation for Cutover Wizard will check your MX records again.
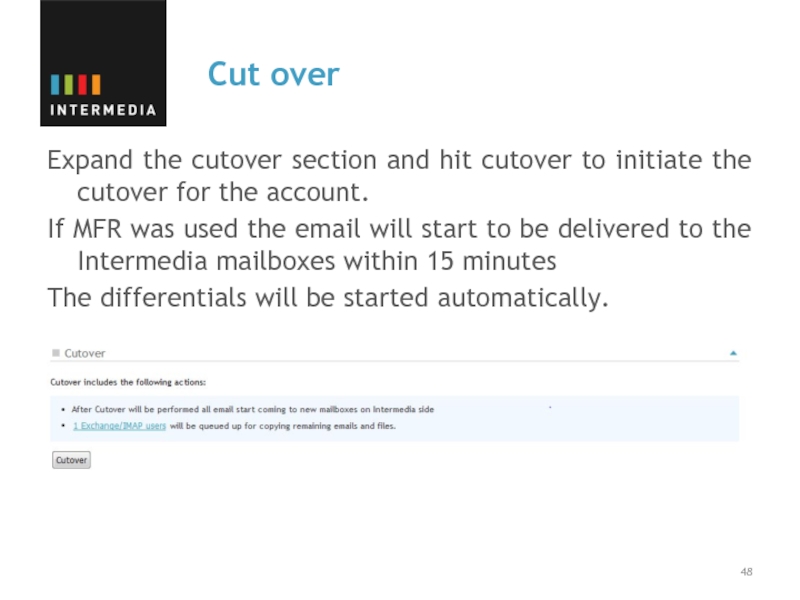
- 48. Cut over Expand the cutover section and
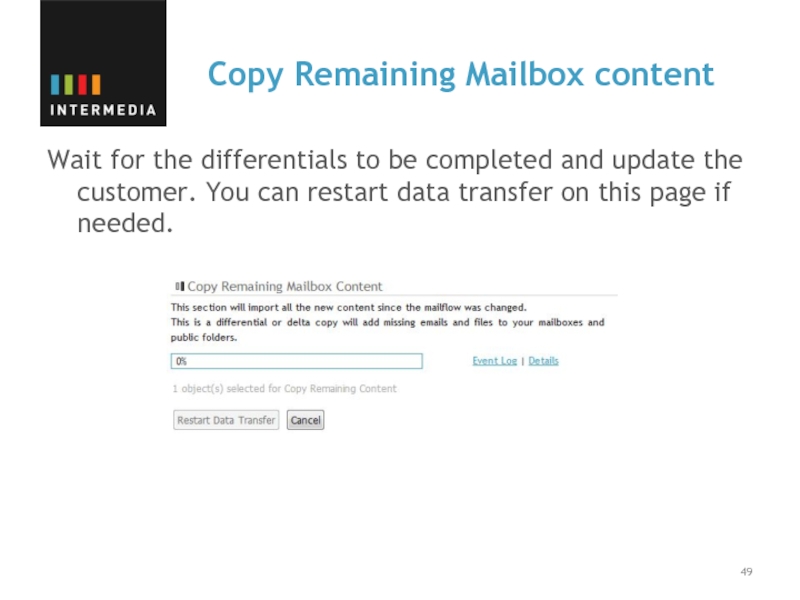
- 49. Copy Remaining Mailbox content Wait for the
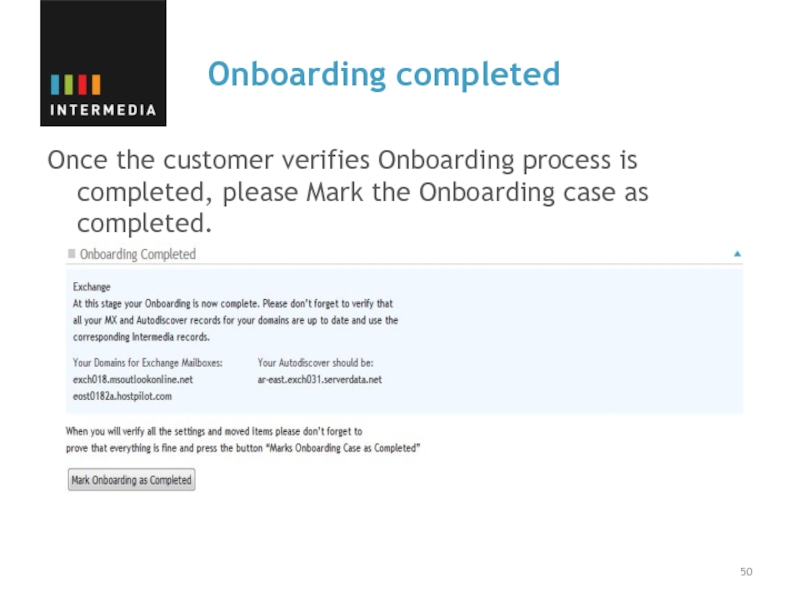
- 50. Onboarding completed Once the customer verifies
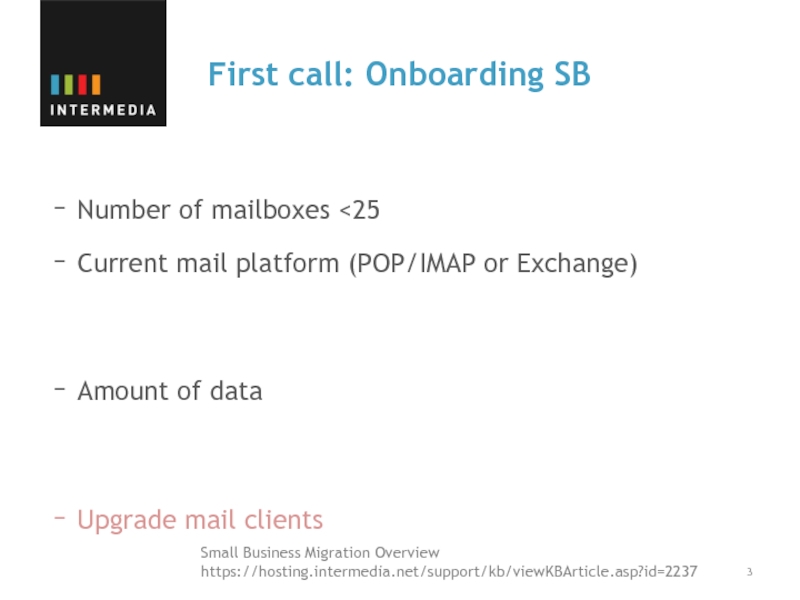
Слайд 3First call: Onboarding SB
Number of mailboxes
Amount of data
Upgrade mail clients
Small Business Migration Overview
https://hosting.intermedia.net/support/kb/viewKBArticle.asp?id=2237
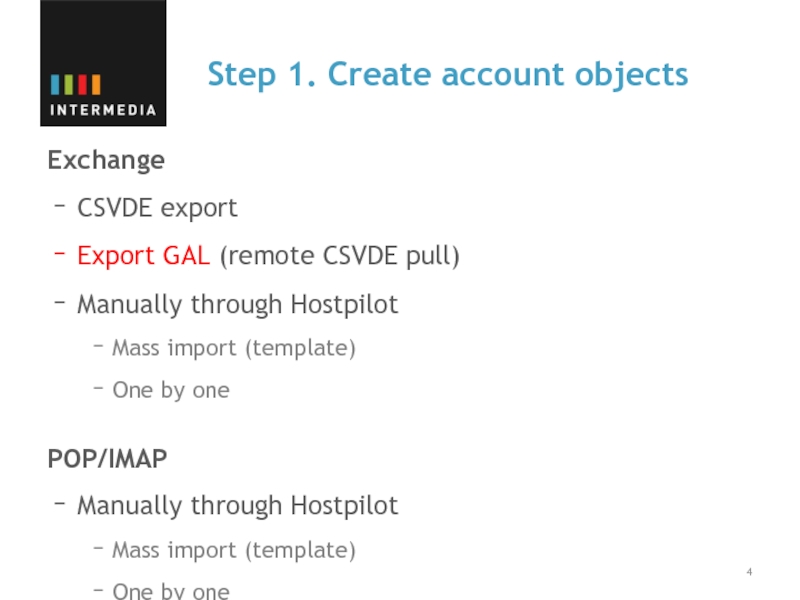
Слайд 4Step 1. Create account objects
Exchange
CSVDE export
Export GAL (remote CSVDE pull)
Manually through
Mass import (template)
One by one
POP/IMAP
Manually through Hostpilot
Mass import (template)
One by one
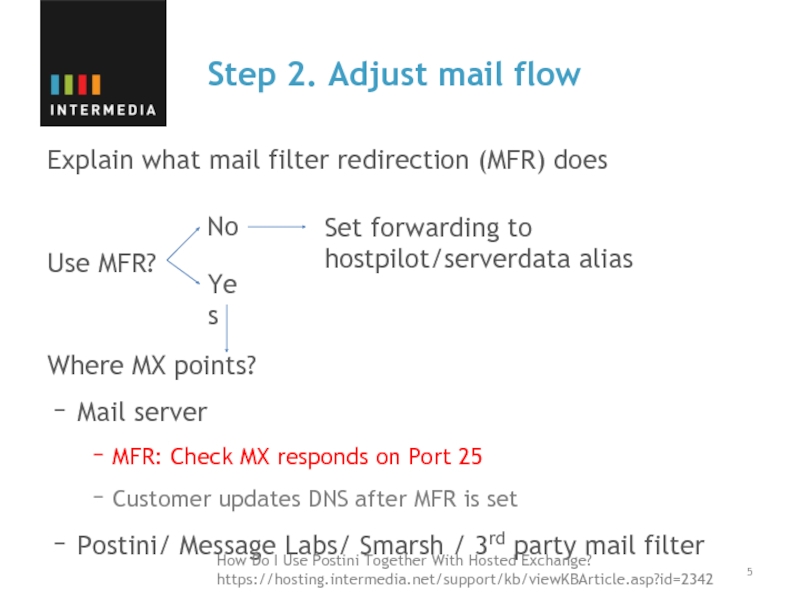
Слайд 5Step 2. Adjust mail flow
Explain what mail filter redirection (MFR) does
Use
Where MX points?
Mail server
MFR: Check MX responds on Port 25
Customer updates DNS after MFR is set
Postini/ Message Labs/ Smarsh / 3rd party mail filter
No
Set forwarding to
hostpilot/serverdata alias
Yes
How Do I Use Postini Together With Hosted Exchange?
https://hosting.intermedia.net/support/kb/viewKBArticle.asp?id=2342
Слайд 6Step 3. Data transfer. Exchange
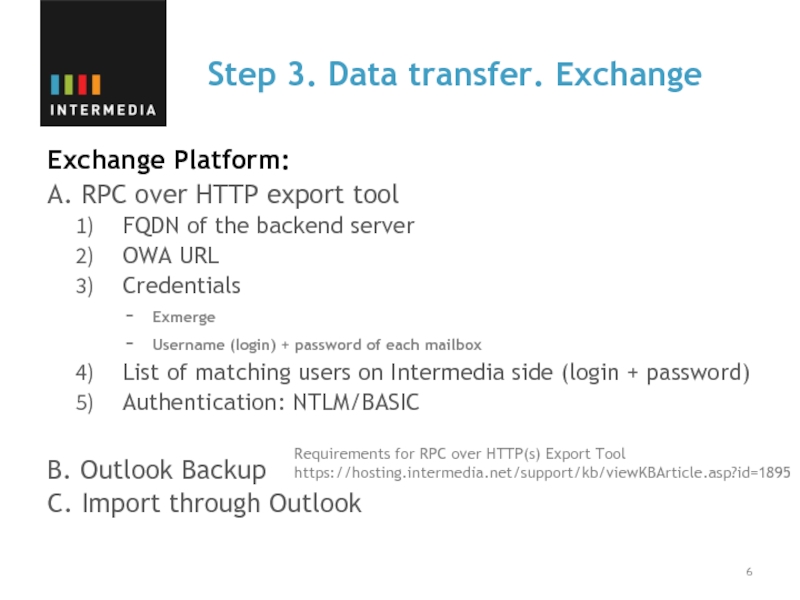
Exchange Platform:
A. RPC over HTTP export tool
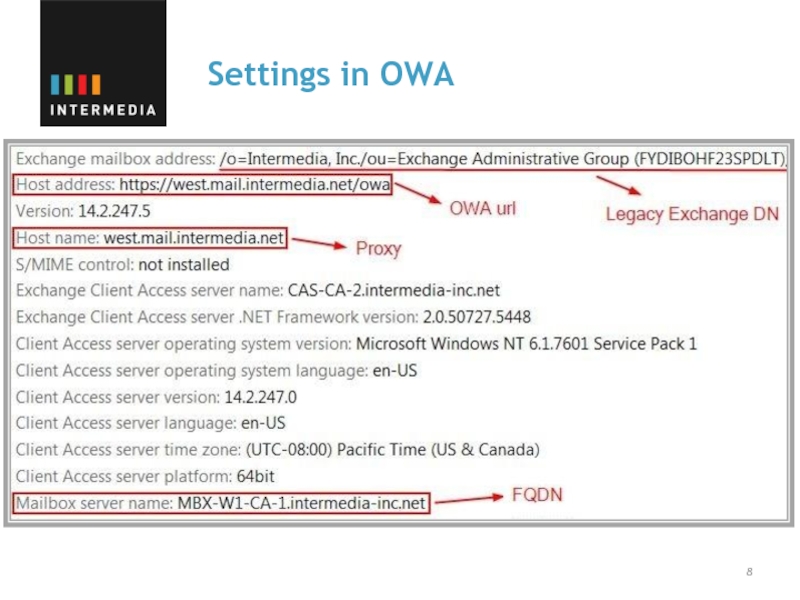
FQDN
OWA URL
Credentials
Exmerge
Username (login) + password of each mailbox
List of matching users on Intermedia side (login + password)
Authentication: NTLM/BASIC
B. Outlook Backup
C. Import through Outlook
Requirements for RPC over HTTP(s) Export Tool
https://hosting.intermedia.net/support/kb/viewKBArticle.asp?id=1895
Слайд 7TEST RPC over HTTP settings
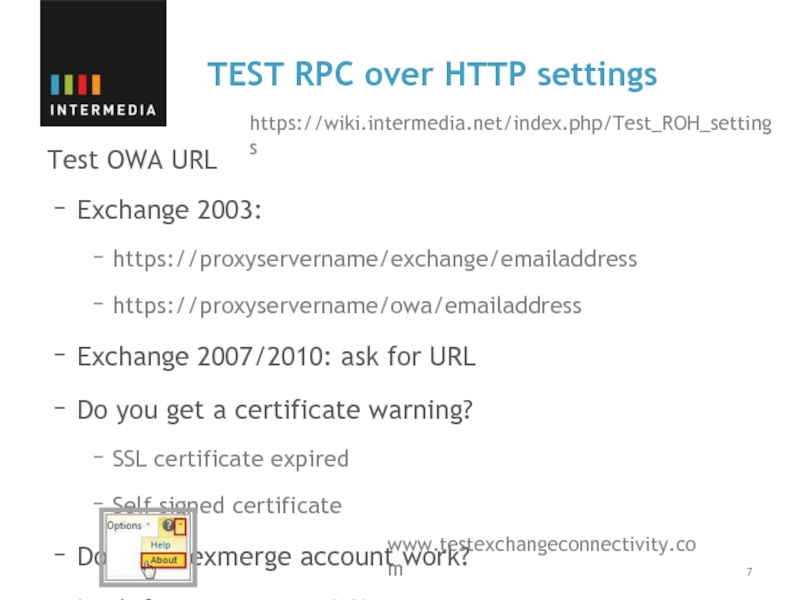
Test OWA URL
Exchange 2003:
https://proxyservername/exchange/emailaddress
https://proxyservername/owa/emailaddress
Exchange 2007/2010: ask for
Do you get a certificate warning?
SSL certificate expired
Self signed certificate
Does the exmerge account work?
Look for settings in OWA
www.testexchangeconnectivity.com
https://wiki.intermedia.net/index.php/Test_ROH_settings
Слайд 9Direct MAPI
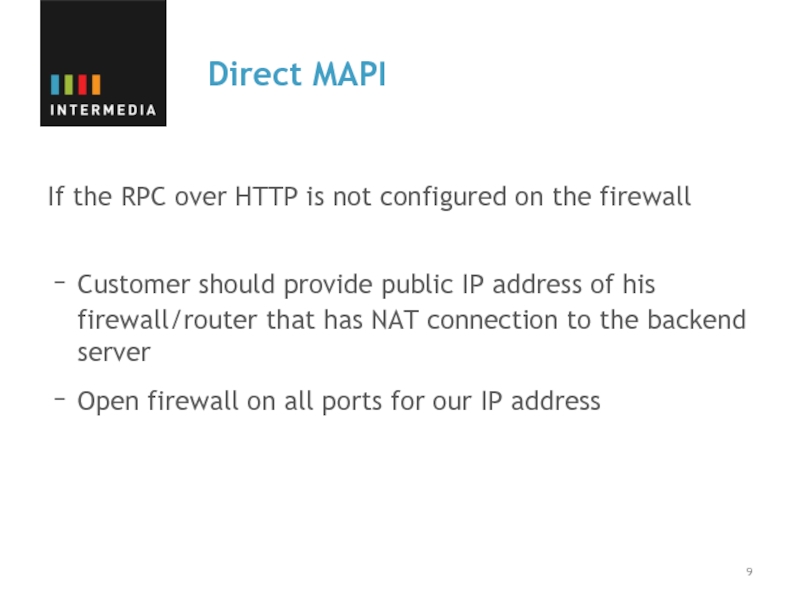
If the RPC over HTTP is not configured on the
Customer should provide public IP address of his firewall/router that has NAT connection to the backend server
Open firewall on all ports for our IP address
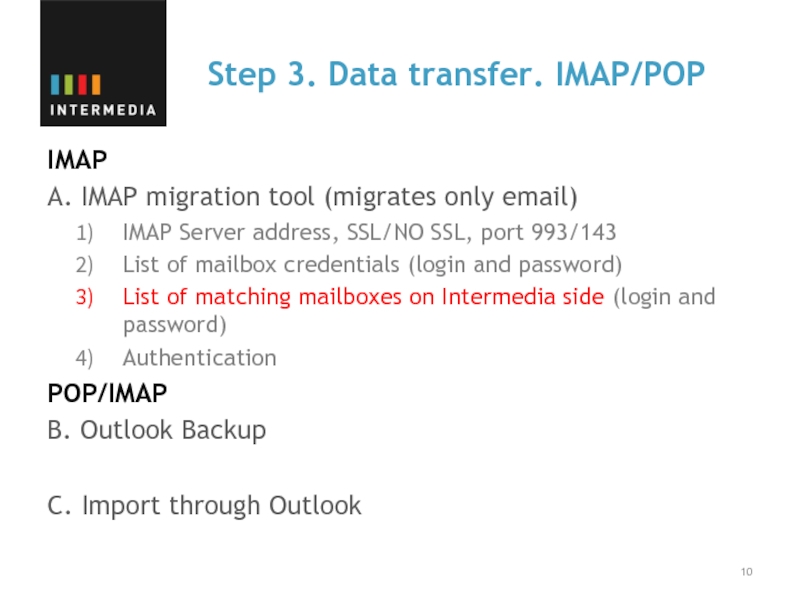
Слайд 10Step 3. Data transfer. IMAP/POP
IMAP
A. IMAP migration tool (migrates only email)
IMAP
List of mailbox credentials (login and password)
List of matching mailboxes on Intermedia side (login and password)
Authentication
POP/IMAP
B. Outlook Backup
C. Import through Outlook
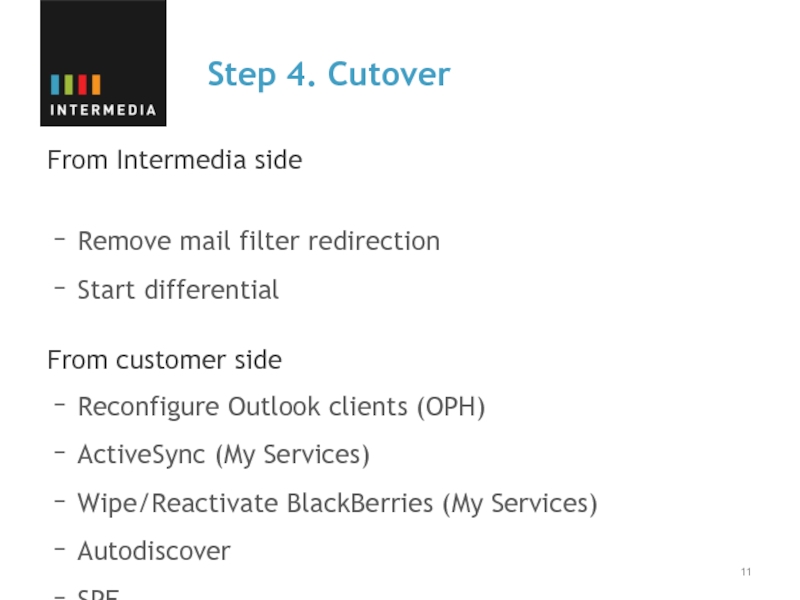
Слайд 11Step 4. Cutover
From Intermedia side
Remove mail filter redirection
Start differential
From customer side
Reconfigure
ActiveSync (My Services)
Wipe/Reactivate BlackBerries (My Services)
Autodiscover
SPF
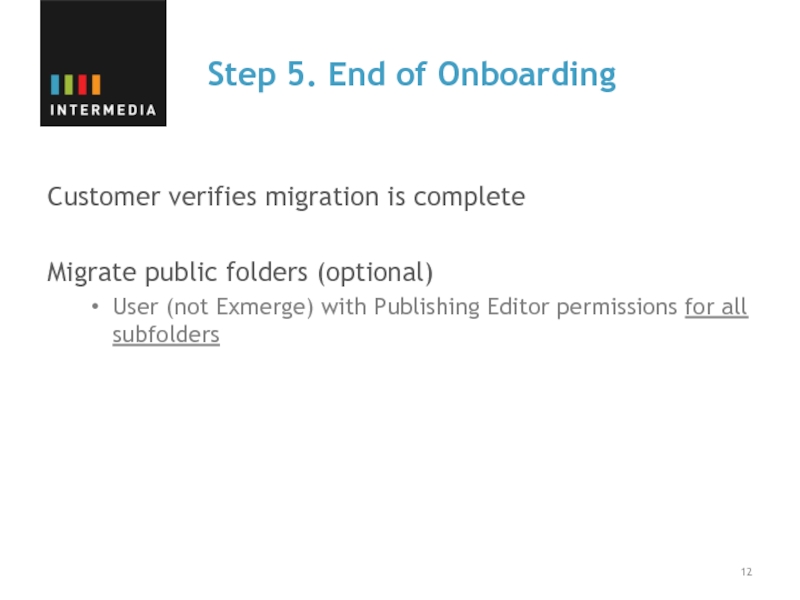
Слайд 12Step 5. End of Onboarding
Customer verifies migration is complete
Migrate public folders
User (not Exmerge) with Publishing Editor permissions for all subfolders
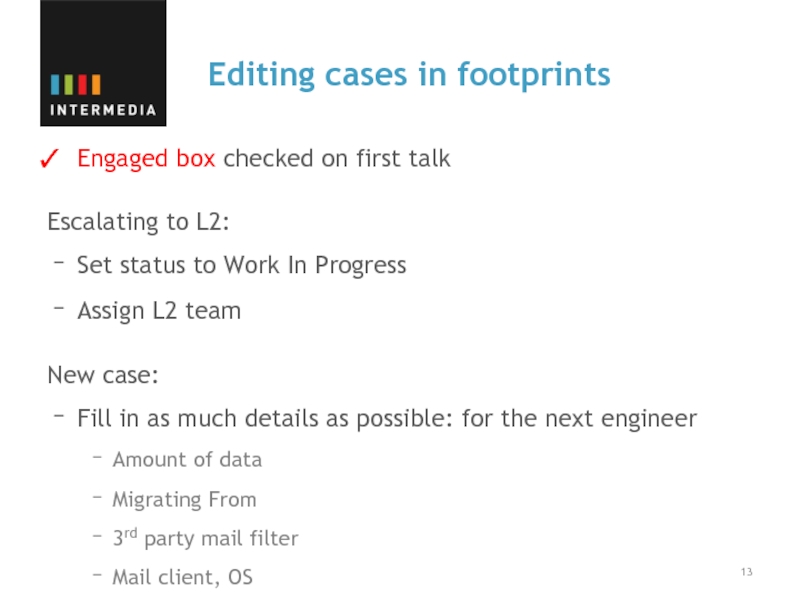
Слайд 13Editing cases in footprints
Engaged box checked on first talk
Escalating to L2:
Set
Assign L2 team
New case:
Fill in as much details as possible: for the next engineer
Amount of data
Migrating From
3rd party mail filter
Mail client, OS
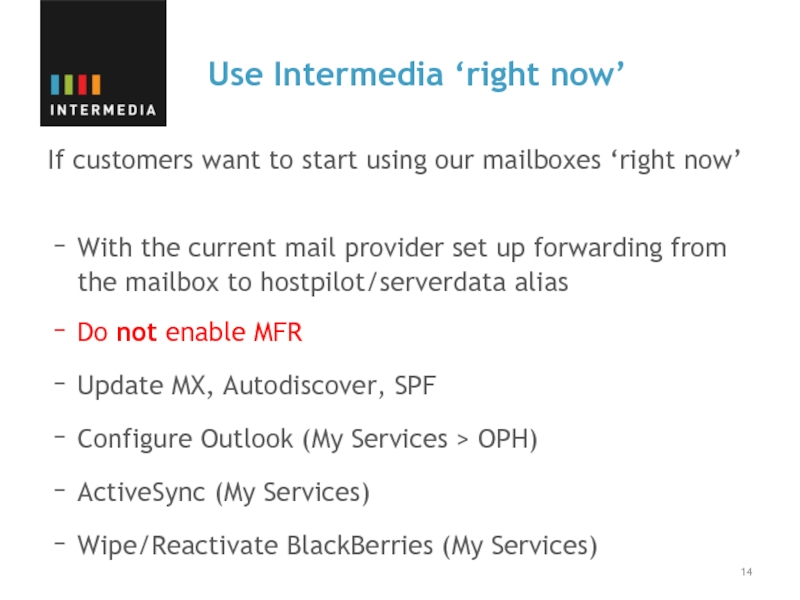
Слайд 14Use Intermedia ‘right now’
If customers want to start using our mailboxes
With the current mail provider set up forwarding from the mailbox to hostpilot/serverdata alias
Do not enable MFR
Update MX, Autodiscover, SPF
Configure Outlook (My Services > OPH)
ActiveSync (My Services)
Wipe/Reactivate BlackBerries (My Services)
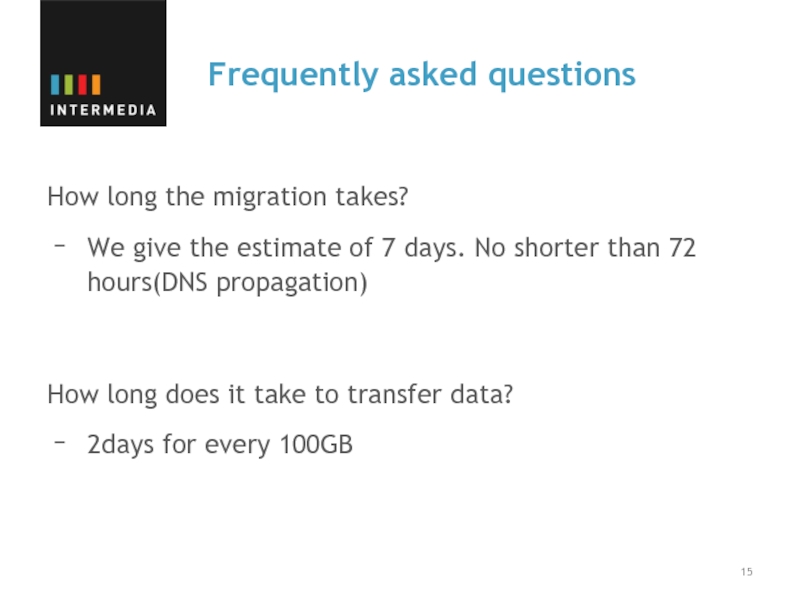
Слайд 15Frequently asked questions
How long the migration takes?
We give the estimate of
How long does it take to transfer data?
2days for every 100GB
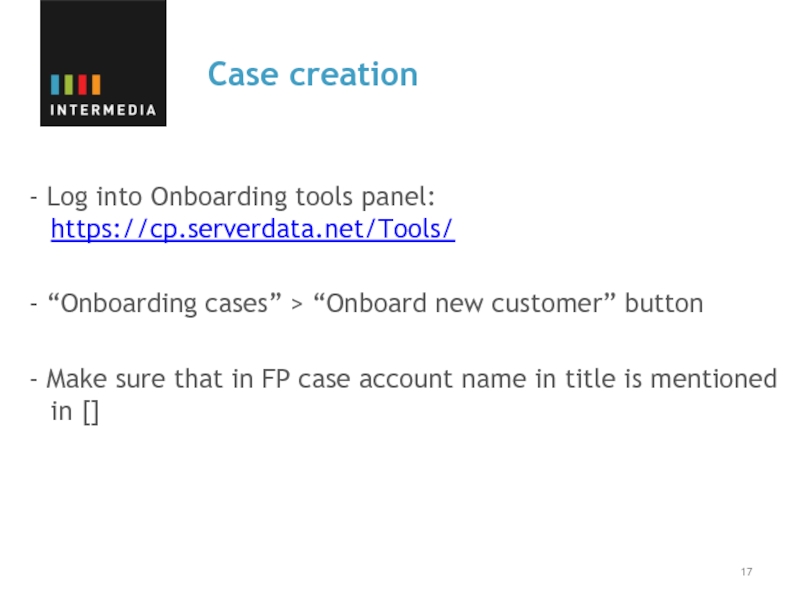
Слайд 17Case creation
- Log into Onboarding tools panel: https://cp.serverdata.net/Tools/
- “Onboarding
- Make sure that in FP case account name in title is mentioned in []
Слайд 20Settings
Type in exmerge credentials or individual email address and password. Field
Слайд 21Settings
Enter Exchange server name (FQDN). If client has autodiscover service –
Слайд 22Save and test settings
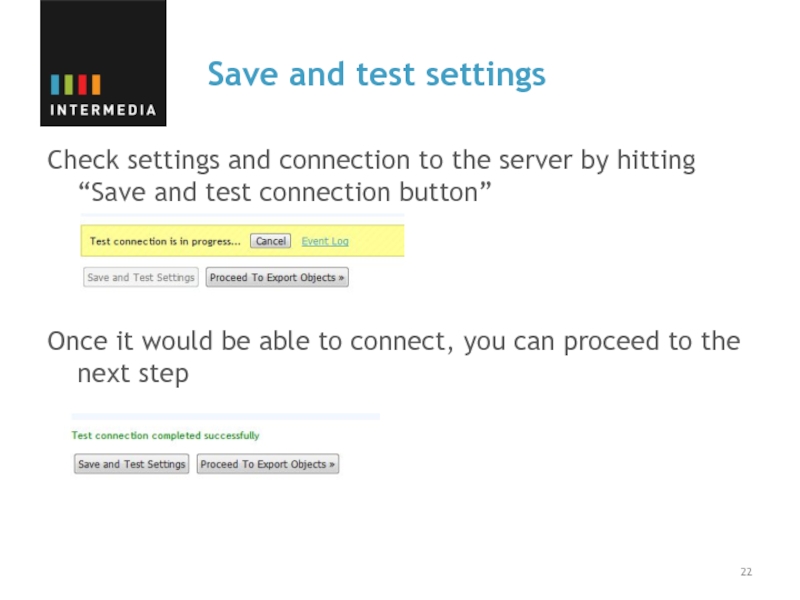
Check settings and connection to the server by
Once it would be able to connect, you can proceed to the next step
Слайд 23Starting Objects Export
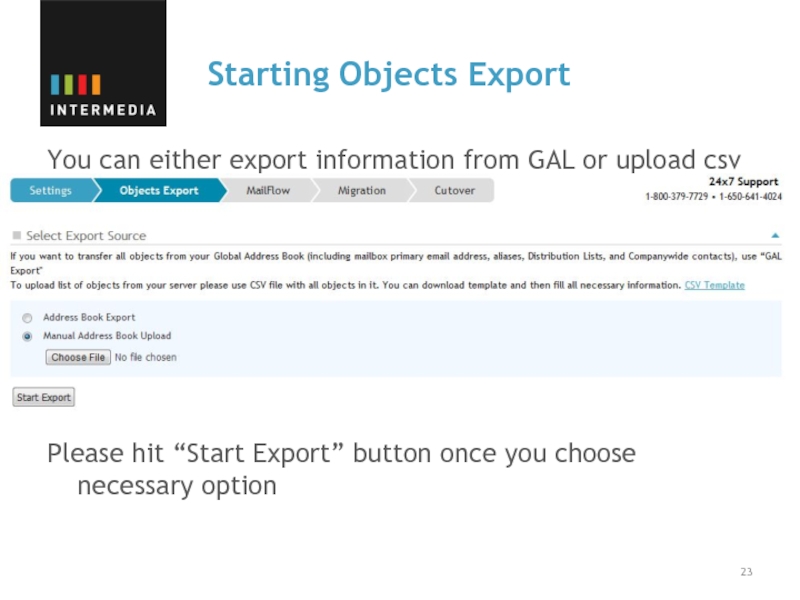
You can either export information from GAL or upload
Please hit “Start Export” button once you choose necessary option
Слайд 24Object Export process
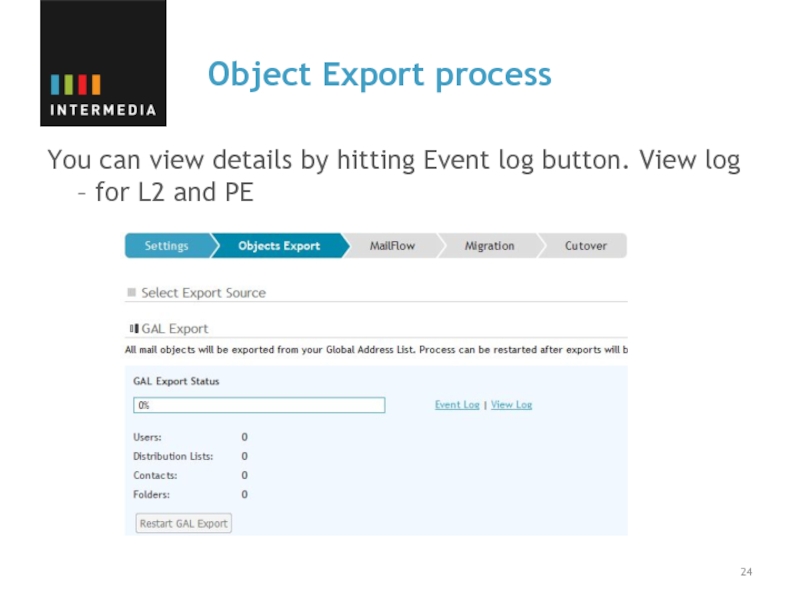
You can view details by hitting Event log button.
Слайд 25Preview AD Objects
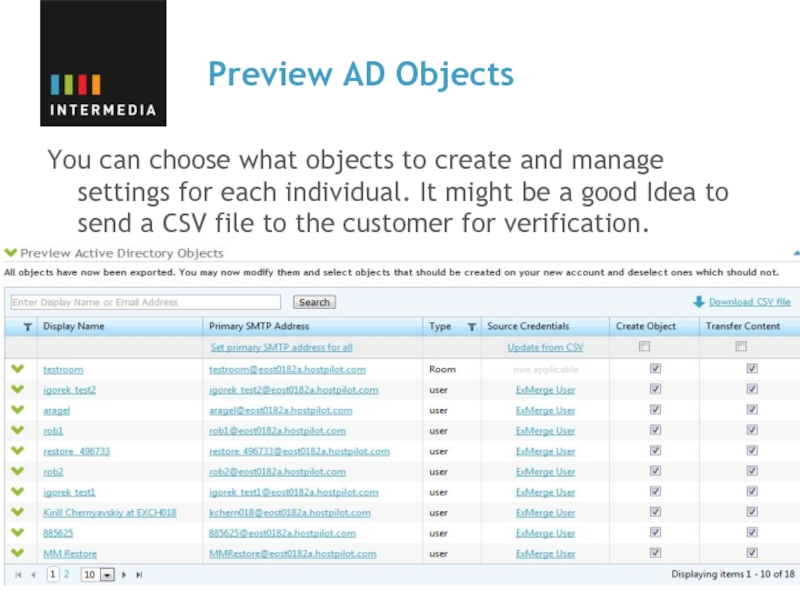
You can choose what objects to create and manage
Слайд 26Managing individual users
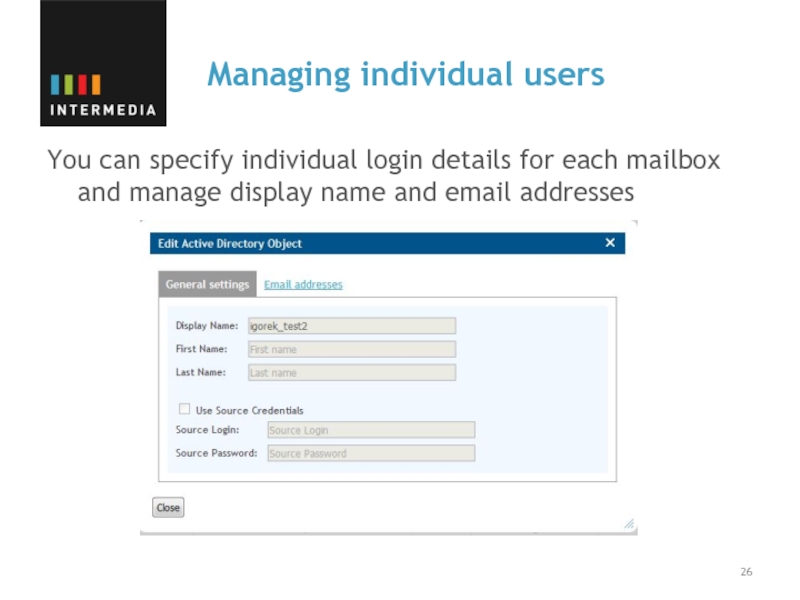
You can specify individual login details for each mailbox
Слайд 28Starting Migration process
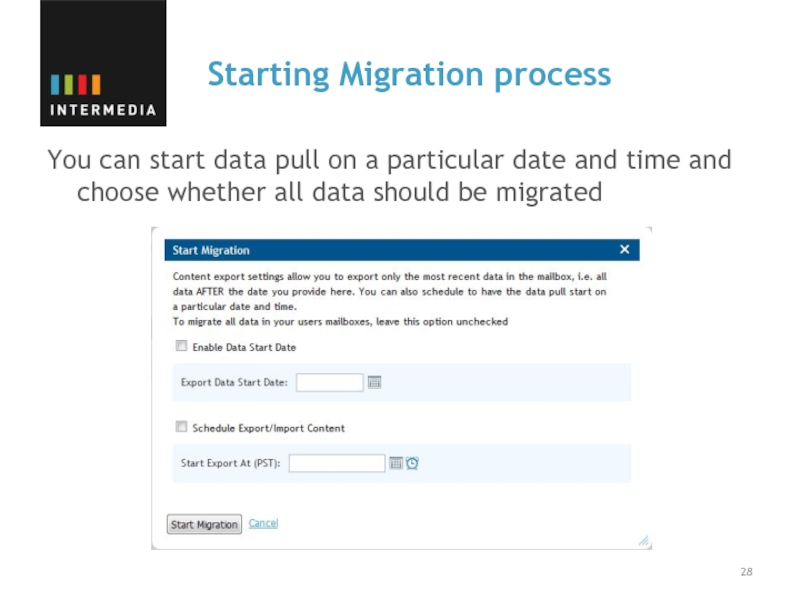
You can start data pull on a particular date
Слайд 29Account Objects creation
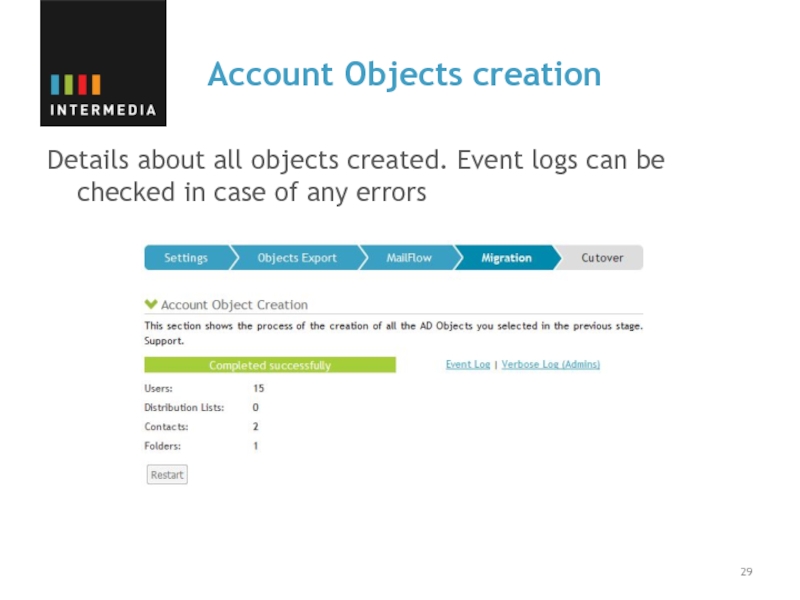
Details about all objects created. Event logs can be
Слайд 30Export content
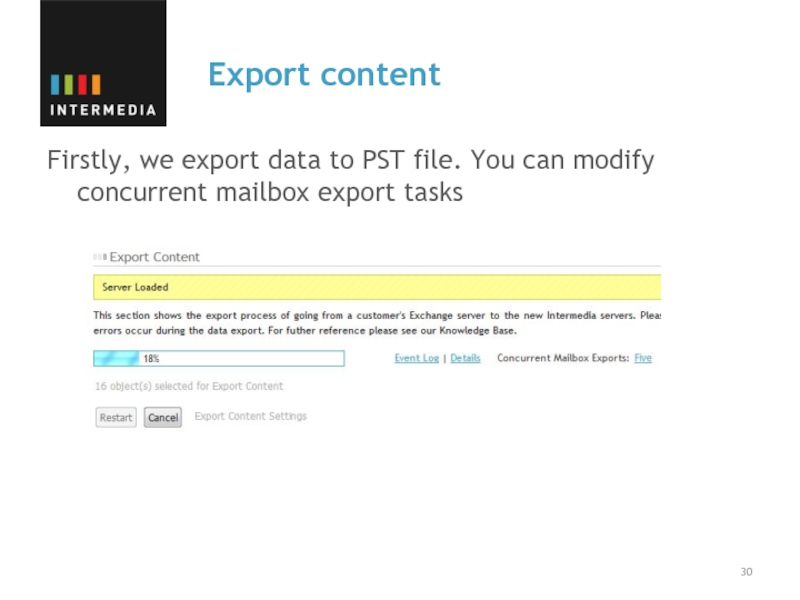
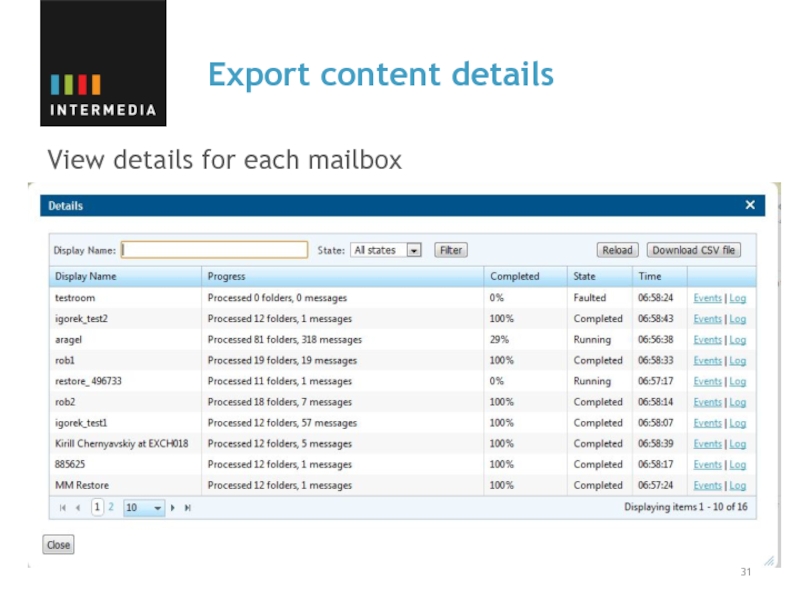
Firstly, we export data to PST file. You can modify
Слайд 32Import Content
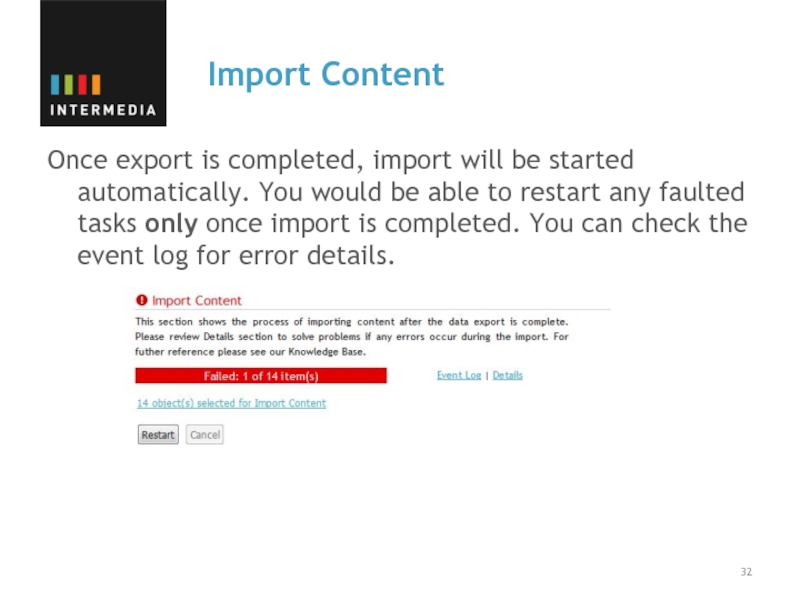
Once export is completed, import will be started automatically. You
Слайд 33Single Sign On
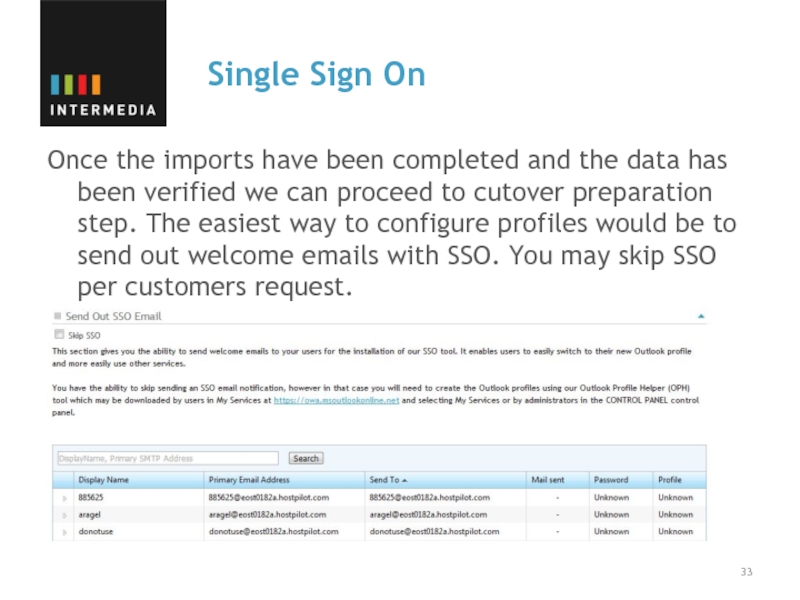
Once the imports have been completed and the data
Слайд 35Cutover
Expand the cutover section and hit cutover to initiate the cutover
If MFR was used the email will start to be delivered to the Intermedia mailboxes within 15 minutes
The differentials will be started automatically.
Слайд 36Differentials
Wait for the differentials to be completed and update the
Слайд 37End of Onboarding
Once the customer verifies Onboarding process is completed,
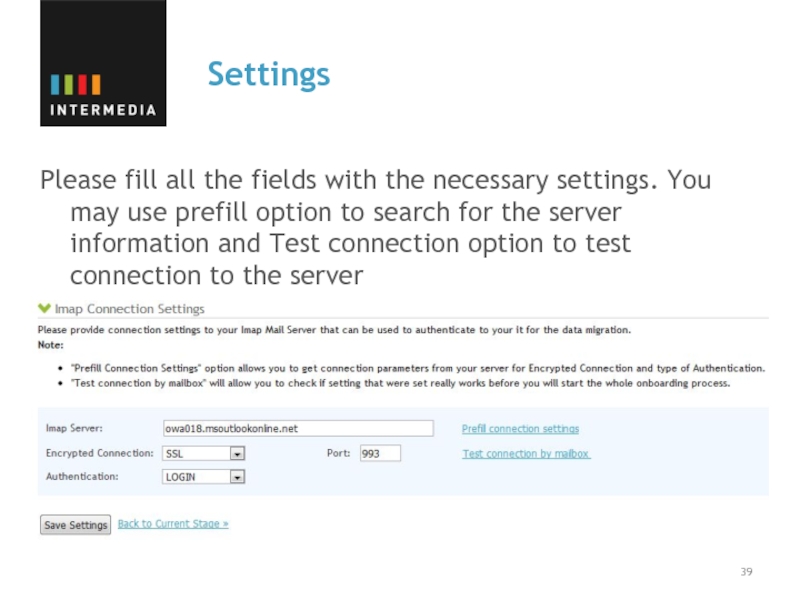
Слайд 39Settings
Please fill all the fields with the necessary settings. You may
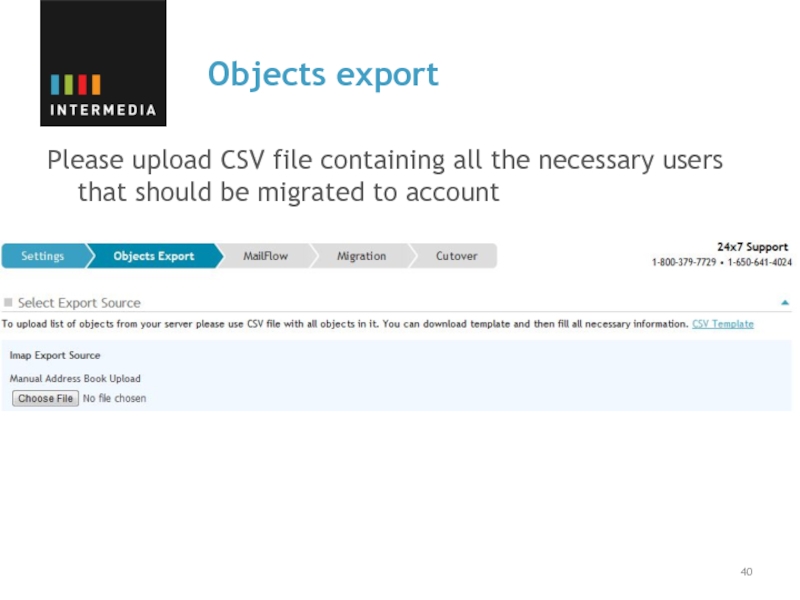
Слайд 40Objects export
Please upload CSV file containing all the necessary users that
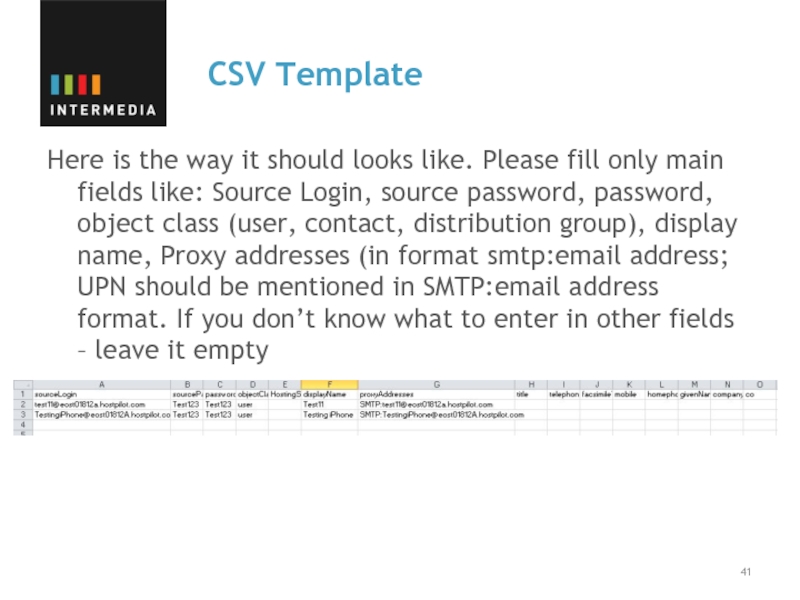
Слайд 41CSV Template
Here is the way it should looks like. Please fill
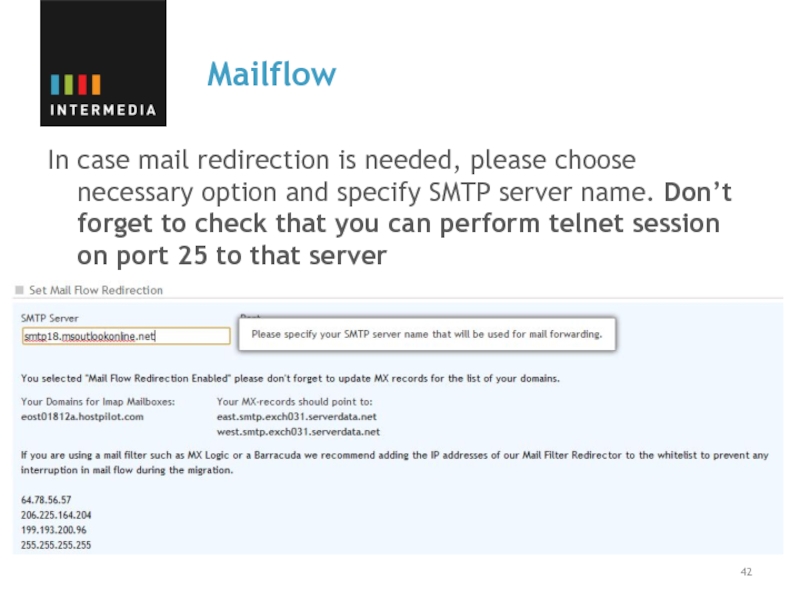
Слайд 42Mailflow
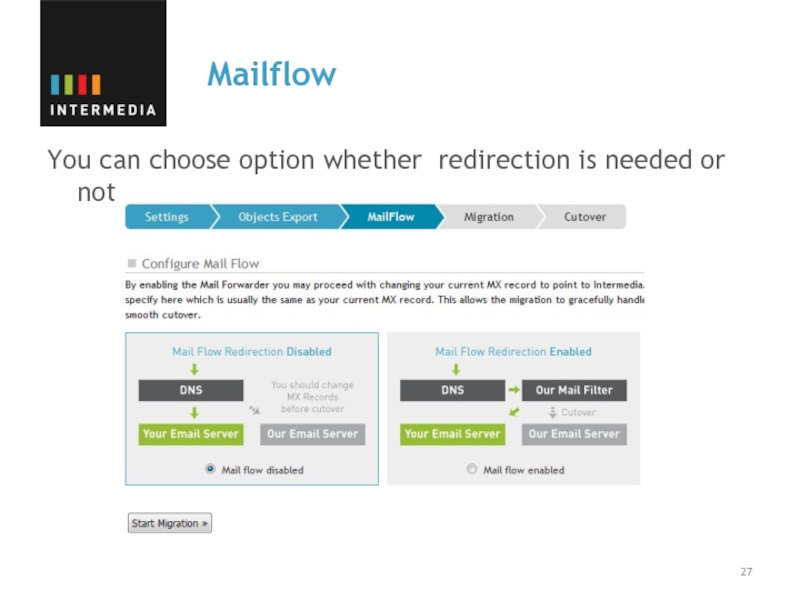
In case mail redirection is needed, please choose necessary option and
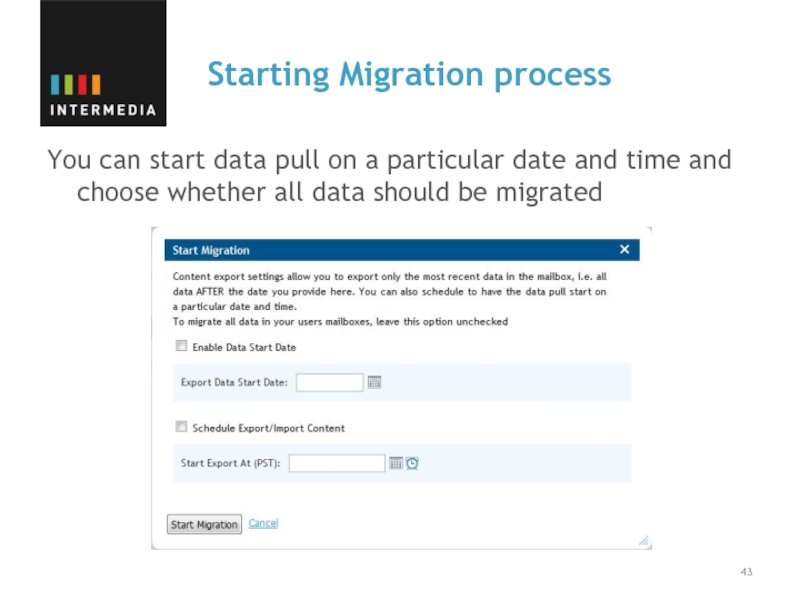
Слайд 43Starting Migration process
You can start data pull on a particular date
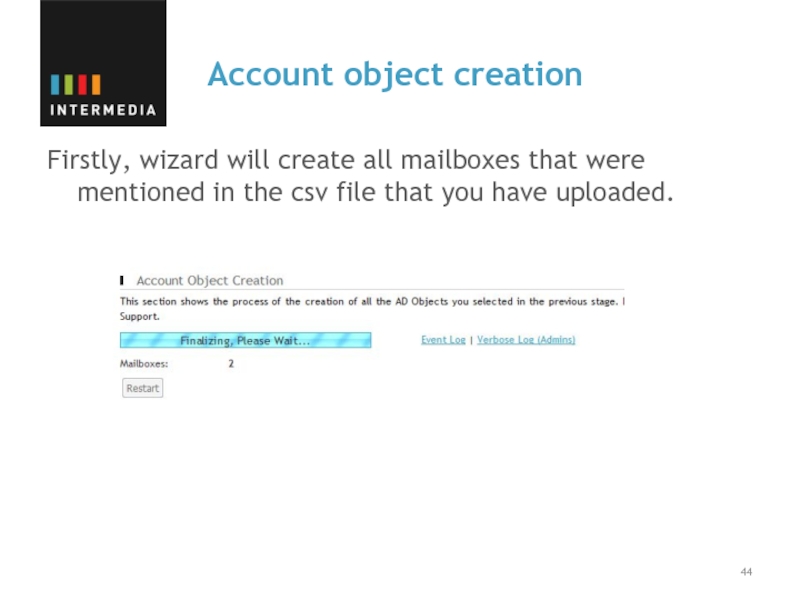
Слайд 44Account object creation
Firstly, wizard will create all mailboxes that were mentioned
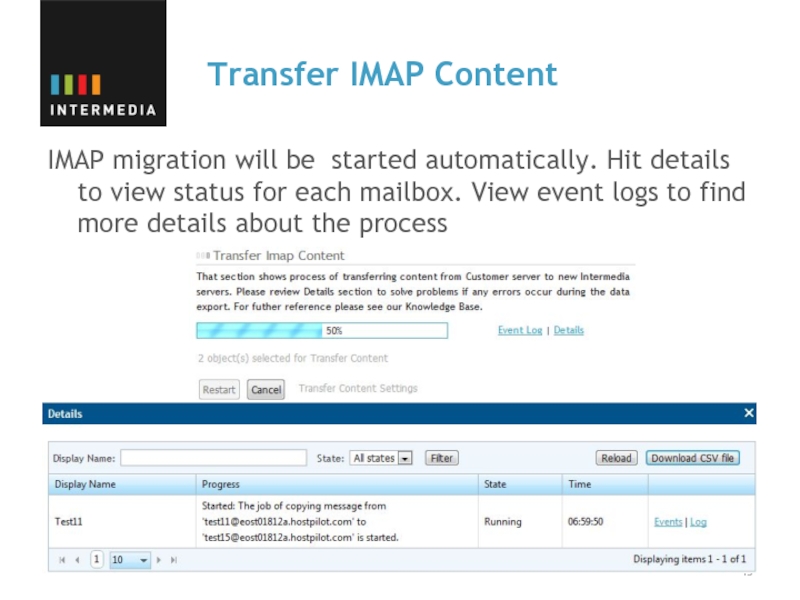
Слайд 45Transfer IMAP Content
IMAP migration will be started automatically. Hit details to
Слайд 46Single Sign On
Once migration have been completed and data has been
Слайд 48Cut over
Expand the cutover section and hit cutover to initiate the
If MFR was used the email will start to be delivered to the Intermedia mailboxes within 15 minutes
The differentials will be started automatically.
